

Garden boxes on legs provide your plants with protection from animals, weeds and drought. Plus they make gardening simpler by eliminating the need to bend over or stoop down – which reduces back and knee pain!
Follow these easy step-by-step instructions to build a garden box on legs for yourself. This DIY project will enhance your gardening experience, improve comfort, and help to foster growth of a flourishing garden.
Step 1: Build the Base
Interested in creating an effortless DIY garden project that prioritizes comfort and convenience? Consider building a raised garden bed on legs. This innovative gardening technique helps overcome space limitations to grow vibrant flowers, aromatic herbs and delectable vegetables right from your own backyard! Follow these tips and tricks for optimizing productivity and enjoyment levels when creating a raised garden bed!
Building the base is the initial step to creating your garden box on legs. Begin by rolling out a piece of hardware cloth on a flat surface with its open side facing down; lay your garden bed (still upside-down) on top, and secure it to this layer using screws at either end – two for each side board slat.
Once the bottom support pieces are secure, enlist someone to assist in flipping the bed over onto its back and attach six triangular braces at each corner of its base structure – making sure they rest against both legs and body of garden box – using a speed square to check that corners of base are straight before tightening them in place.
For an attractive yet sturdy garden bed, start by lining the inside of the planter with landscaping fabric or weed barrier. This will prevent weeds from coming up through the soil, while protecting plants from pests and other threats. Next, fill up your raised garden with organic compost and topsoil; adding in some bags of rotted manure will further increase soil fertility for maximum growth potential.
Raised gardens on legs require less labor and maintenance than regular outdoor beds, as they are more durable, versatile, and offer less maintenance needs. You can use one to grow plants that would not thrive otherwise, like kiwis or watermelons; just follow proper planting techniques such as using quality soil, optimizing vertical space optimization, practicing companion planting strategies and staying ahead of pest control issues to guarantee success!
Step 2: Build the Frame
By creating your own raised garden bed, your plants will be protected from animals and weeds while making maintenance simpler as you won’t have to bend down for them. Plus, creating custom planters using an old desk or piece of furniture–even something unconventional like an abandoned metal garbage can–can give your garden an eye-catching appearance that no other garden can match!
Building the frame for your garden box on legs will require wood planks and various tools, such as a miter saw or circular saw. Redwood or cedar are great choices as they’re sturdy materials that will withstand weathering, so take careful measurements when marking each wood plank with dimensions for your box before cutting the boards to size using galvanized screws or nails. Once cut, arrange all boards on a flat surface before connecting them together with galvanized screws or nails for assembly.
Once your long side pieces of your garden box have been assembled, it’s time to add legs. Arrange the long side boards so that they overlap, and screw in four leg pieces using 2 1/2-inch wood screws so they are securely fastened to each corner of the box.
If you want to make gardening more comfortable, installing sturdy tomato cages or string trellises as supports for growing plants may provide your garden with a more refined, finished look while saving yourself from having to stoop down when reaching out for plants. Although this extra may add cost and time commitments for installation purposes, this step will give it more refined, refined appearance that makes reaching plants easier.
Before adding soil, line the bottom of your garden box with landscaping fabric or weed barrier to keep out weeds while helping retain moisture more effectively. After you’ve lined your box, fill it with a mixture of compost and topsoil; remember to add organic fertilizer for maximum plant nutrition!
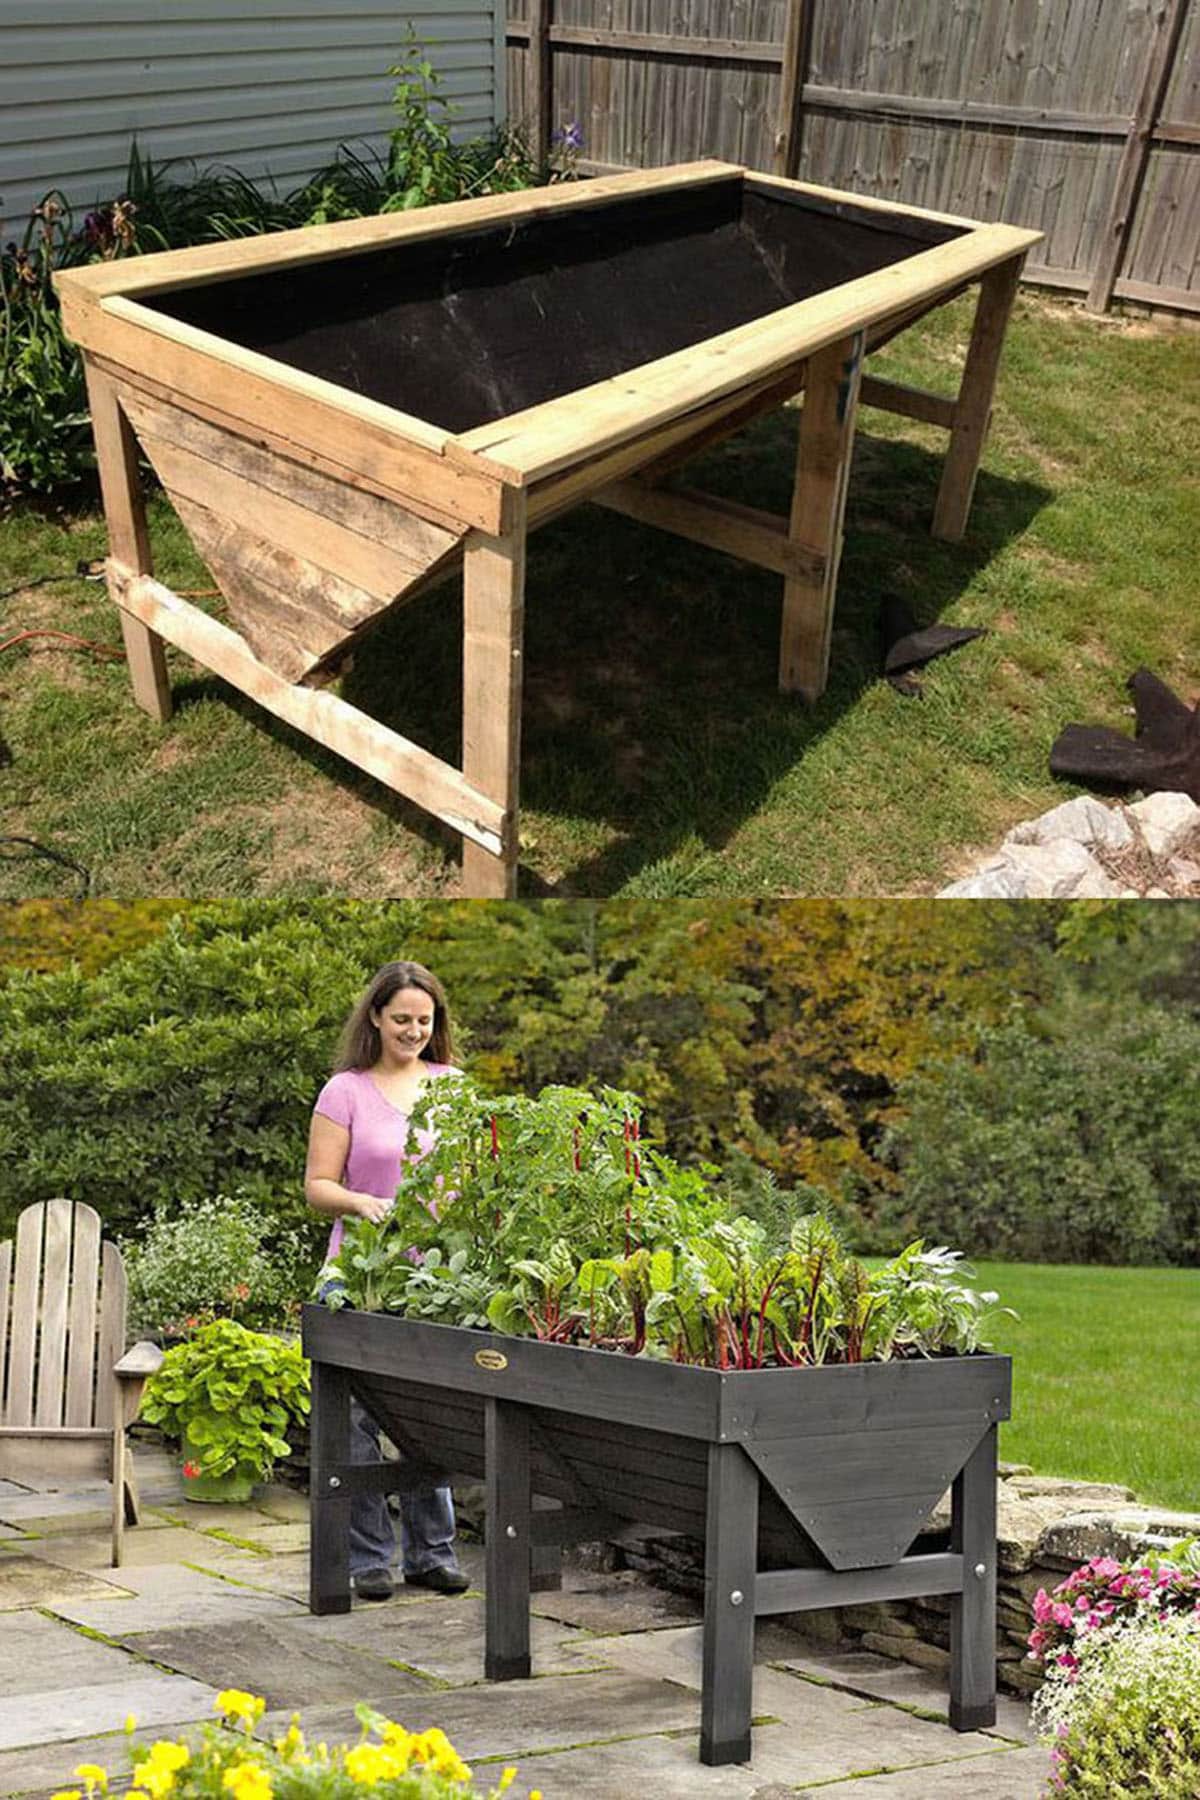
Step 3: Build the Legs
No matter your gardening goals are, building a garden box on legs may help you overcome space limitations and enjoy all of its rewards right at home.
This elegant DIY waist high garden box embodies both sophistication and durability, boasting corrugated steel sides that add modern charm to your garden space. Plus, it includes a solid wood base for extra stability as well as two-cornered board legs to complete its unique and contemporary aesthetic.
To build your raised garden bed, you will require some basic materials. First, cut wood planks according to their dimensions of the raised bed frame before using a saw to cut them to size. Cut four pieces of wood for legs as well and ensure all are treated with preservative for added protection from weathering and rot.
Once you have the wood planks and four pieces of wood for legs, assembling the raised bed frame can begin. Simply connect each wood plank using galvanized screws or nails, attach the legs securely using screws, then reinforce your legs by adding extra pieces of 2×4.
After you’ve finished building your garden box, it is time to add soil and plant seeds or seedlings. To ensure that their plants receive adequate water and nutrition, breathable fabric such as tarpaulin or plastic sheeting should be placed over the bottom and sides before adding soil as this will protect it from becoming sodden and oversaturated, which would suffocate their roots.
Step 4: Build the Planter
Garden boxes on legs provide the ideal solution for urban gardeners seeking to cultivate herbs, flowers and vegetables in containers. Their design makes gardening more accessible for older people by eliminating rabbit damage and weed pressure while making gardening less physically taxing – especially important if gardening requires bending over. Furthermore, raised garden planters double as storage areas for supplies like pruners or fertilizer!
Begin by creating the frame for your garden box on legs. Cut wood planks to fit the measurements of your frame, and assemble using galvanized screws or nails – make sure all corners are square before moving on to step two!
As soon as your frame is assembled, arrange four one-by-six boards (two long and two short) on a flat surface with their face up. Attach them to four-by-fours so they form a rectangle; long boards should occupy the top and bottom corners while short ones form sides for the garden bed with legs.
Build the other side of the planter using two 1×6 boards by screwing three slats onto each of the longer boards, one at each end and then between. Repeat this process on both sides to complete your box.
Once the box is assembled, it’s time to fill it with gardening soil. Fill your raised bed using a mixture of compost and topsoil before covering it with landscaping fabric or weed barrier; this will prevent unwanted plants from emerging underneath the soil while also helping retain moisture levels for healthy plant growth.
Building a raised garden bed on legs is a straightforward project that can be finished within hours. To ensure your gardening success in a raised bed garden, regular maintenance and monitoring must take place, along with selecting top quality soil, companion planting techniques, and sufficient watering measures.