
Elevated garden beds warm quickly in spring, enabling earlier planting. Plus, you have complete control over their soil makeup, reduce weeding needs and can assist those who struggle with bending and stooping.
Edge your beds using materials such as wood, rocks or bricks without incurring additional charges; avoid painted or pressure treated wood as this may release chemicals that harm plants.
Materials
When designing a raised garden bed, it’s essential to carefully consider the materials you will use. While any material can be used, some are better at providing long-term rot resistance and overall longevity than others. Some options worth exploring may include using recycled railroad ties, pallets or cinder blocks; although these alternatives tend to be less costly than cedar; their moisture sensitivity requires additional care and maintenance.
When selecting wood boards for a raised garden, opt for cedar or redwood options which naturally resist rot; these will ensure it lasts for many seasons of use versus pine which rots within just one or two. When using pallets as bases for gardens, look out for those marked “HT”, otherwise these could have likely been treated with methyl bromide which has been known to disrupt reproduction and is considered toxic by experts.
When building your raised garden bed from bricks or cinder block, always use top quality materials. Poor-grade bricks may crack in cold and wet environments while low-quality concrete may lead to delamination issues for these blocks. Furthermore, these raised beds require liners in order to prevent soil seepage through.
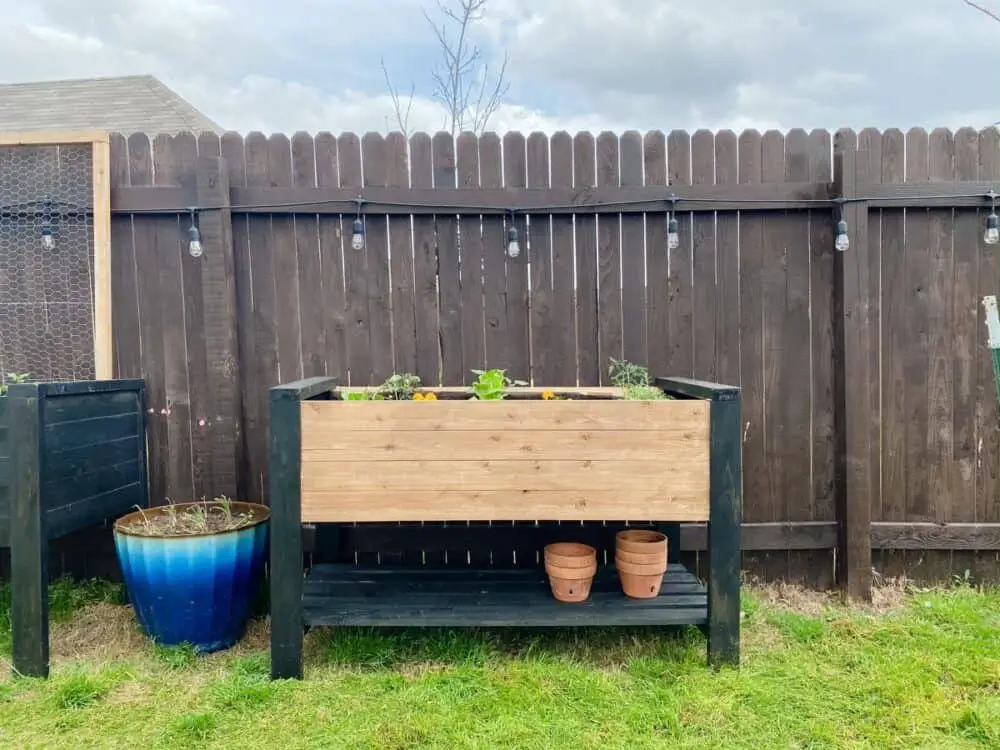
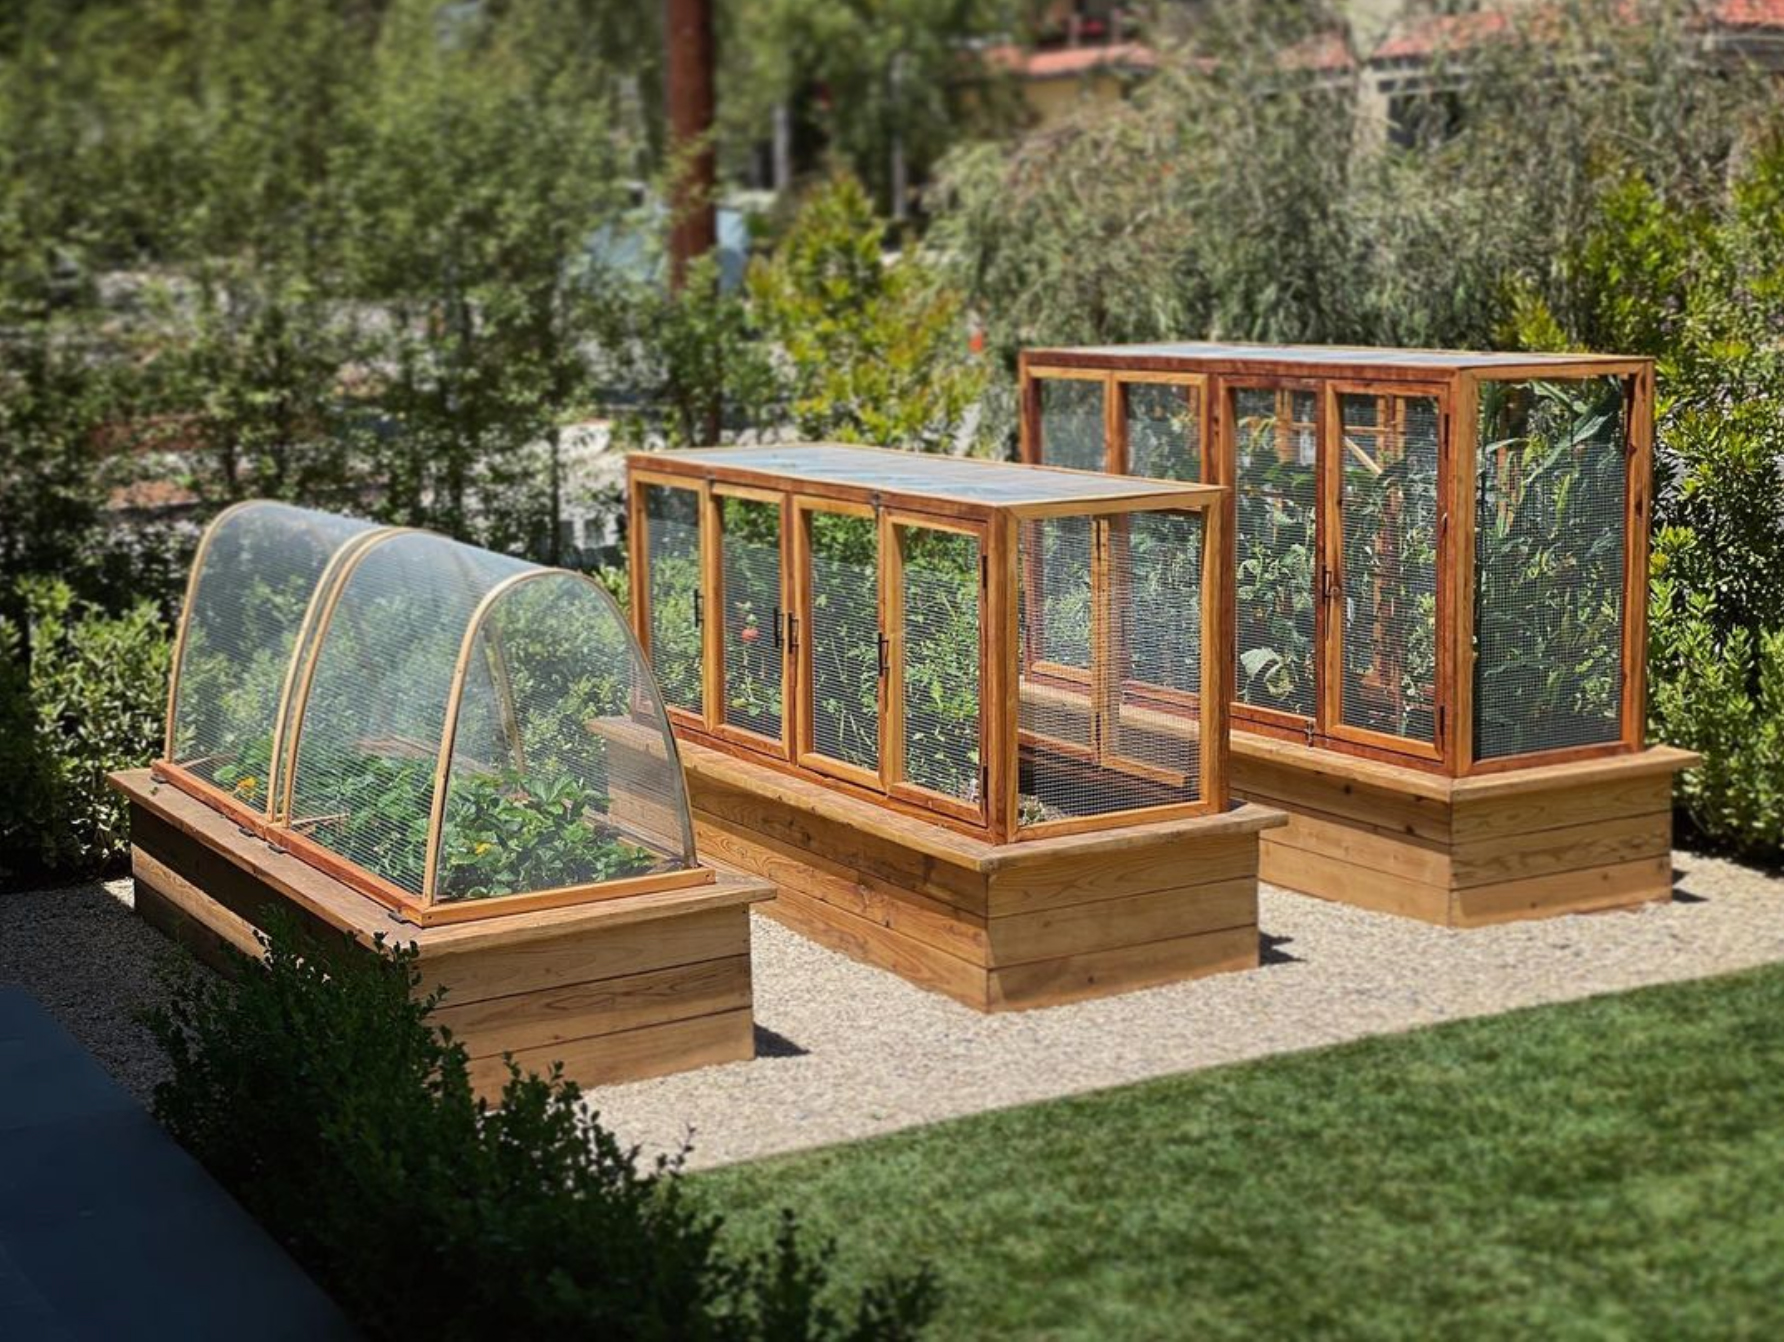
Or you could purchase a raised garden bed kit, which can be assembled on patio or deck and makes garden maintenance simpler for people with back or knee issues. Furthermore, these kits offer various size and shape options to fit into any garden space.
To control weeds in a raised garden, line its base with landscape cloth or coarse sawdust prior to adding soil. This will enable you to add an initial thick layer of organic matter that will eventually decompose into compost while simultaneously helping prevent burrowing pests from entering your vegetable plot. Hardware cloth may be added around its perimeter for additional weed control measures if necessary.
Layout
Raised beds offer gardeners many advantages when it comes to planting: they warm faster in spring for an earlier planting season, provide greater control over soil composition, better drain clay or sandy soils and eliminate or minimize bending or stooping when performing ground-level tasks such as watering or weeding. Raised beds also allow you to use trellises or cages for vining crops which provide greater crop rotation benefits.
If you decide to build your own elevated garden beds, the first step should be drawing out a simple plan on graph paper or in a gardening journal (this way you can track your progress over time). Aim for a square-foot layout; this makes managing and providing each plant with enough sunlight easier. Next, lay out each bed according to the dimensions of your plan, taking into account any trellises or cages you plan to add as well as providing enough room for each plant you’re growing in each bed.
As part of your frame’s construction, choose cedar slats for their long-lasting and appealing qualities. Cut them to length before smoothing their edges using a sander. Additionally, 2×4 stretchers should be added at the bottom by butting together long slats with short ones and attaching with screws – this way completing your look!
Dependent upon the height you desire for your beds, cross-supports may be required to prevent bowout of larger structures due to soil weight. Cross-supports should especially be considered necessary when adding soil weight beyond 6′ height as added soil could cause these beds to bow outward and bend outward over time.
As part of your soil preparation, be sure to include an amendment such as organic compost or well-rotted manure as an organic amendment layer. This will give crops a good start while increasing fertility of the soil for healthy growth. When planting, ensure you use high nitrogen fertilizer granular fertilizer; this will help ensure strong plant growth throughout the year if not supplemented by regular liquid applications of liquid fertilizers.
Building
Raised beds offer more productivity than ground plantings and are particularly helpful for people with back or knee conditions who find bending and kneeling difficult. A waist high garden bed allows easy plant reachability while simultaneously controlling weeds – all qualities necessary for creating an expansive vegetable patch that produces fruits.
To build a raised garden bed, start by clearing out the area where it will go. It should ideally be placed in full sun; vegetables require 6-8 hours of direct sunlight per day. Furthermore, it’s ideal if the long side of the raised bed faces south so all plants receive equal sunlight throughout the day.
Assemble the frame for your bed by stacking 2x4s along the length of the area you wish to cover with it and fastening them with 2 1/2 inch galvanized screws, using a level to ensure its squareness before attaching screws to secure it together.
Once your frame is assembled, fill it with soil designed specifically for raised beds and planters – this should prevent compacted soil from compacting too quickly and hindering proper drainage. Regular garden soil tends to compact quickly, leading to drainage issues in raised beds.
After mixing in a granular fertilizer to help get the soil going in the right direction, top off your bed with compost, leaves or manure for an impressive look.
When creating raised beds from treated lumber, it’s essential to line the inside with plastic tarp to avoid leaching chemicals into the soil. Some opt for old railroad ties as these contain no creosote and will decompose over time.
As another way of lining your raised bed, spanner boards are another popular solution for adding weather resistance and can serve many functions when used effectively. They’re great for placing buckets when weeding or adding amendments, as well as offering support when reaching into the bed for any reason. They come in various wood varieties; cedar and redwood boards tend to be weatherproof.
Finishing Touches
Once your garden bed is complete and covered with soil, it is ready for use. While you still must weed and water regularly, having more control over soil quality allows more precise adjustments such as amending it with compost, leaves, manure or any other organic matter as necessary to ensure healthy soil quality – especially important if growing plants with heavy feeder needs such as vegetables.
Before filling your bed with soil, ensure it is level by using a level and placing a rigid board across its span and using this as an indicator for levelness. Doing this will help avoid diseases while making planting easier.
If your raised garden bed is longer than 8′ or taller than 18″, cross-bracing may be beneficial in order to prevent bowing outward in the middle of its span. You can do this using a hacksaw and screwing an aluminum flat stock piece cut to width by hacksaw onto either end (photo 1A).
Place two 26” x 8” corrugated panels on a surface large enough for two 26×8 panels, and arrange one of these on top of four 8″x4″ cedar boards so the outside edge curves upward and is flush with each 4×4″ cedar board (photo 1B). Secure it to each board using three 1″ self-drill screws that begin in its center groove before skipping two grooves per screw – repeat this process for your other panel to complete your raised garden bed.
At this stage, it’s time to add short walls so your garden bed forms a squared off rectangle. Use 2-by-6 wood boards laid flush against both ends of your long walls to fasten them together using 2-1/2-inch deck screws – creating a completed and sturdy side of your garden bed.