
Once garlic has been harvested, it needs to be properly stored before it will remain edible. Curing should occur in a cool and dry location that’s protected from rain or direct sunlight for maximum effectiveness.
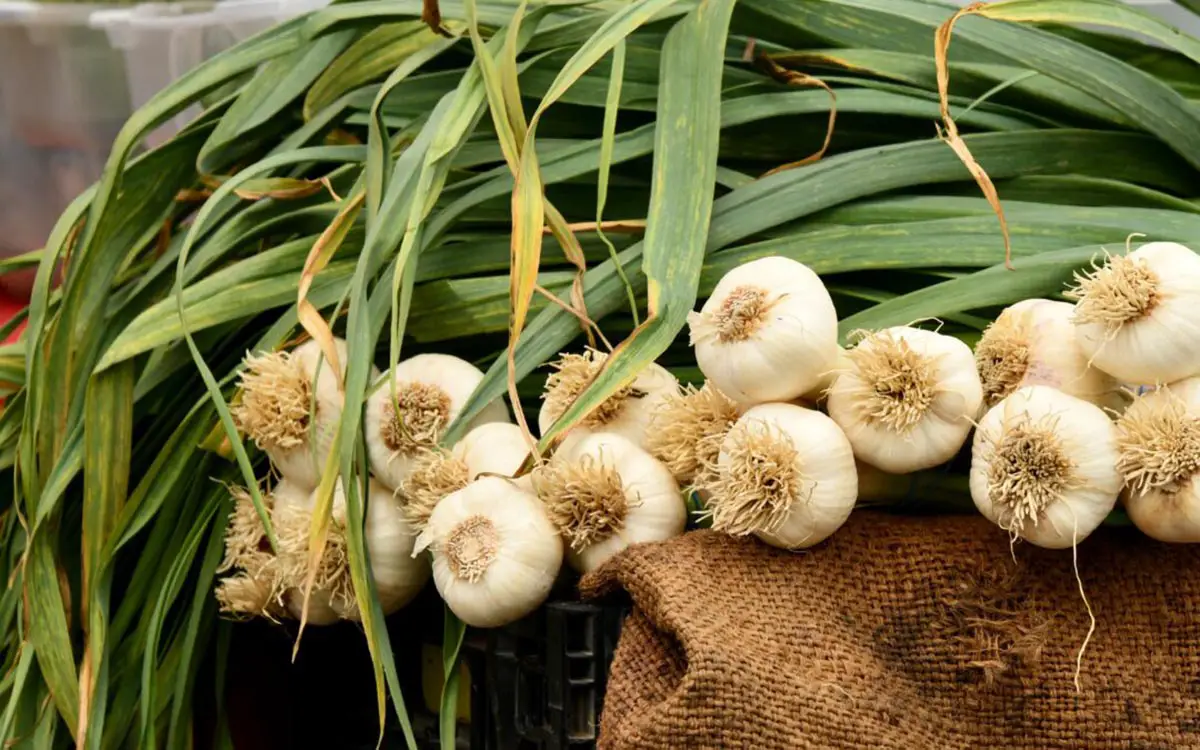
Start by gently digging up your garlic from the soil using a garden fork (not your shovel or spade) or spade. Brush off any loose soil from each bulb before cleaning out any remaining roots with gloves on.
Temperature
No matter if it was grown yourself or bought at the grocery store, proper storage of garlic is crucial to its freshness and flavorful qualities. Temperature and humidity both play a key role in how long garlic lasts; whole heads should be stored in an area free from heat sources like stoves or refrigerators as high temperatures can speed sprouting/rotting while excessive humidity encourages mold growth.
Softneck and Creoles garlic varieties tend to keep for the longest, followed by Porcelains, Artichokes, Purple Stripes and Rocamboles. All kinds of garlic may last even longer when separated out into individual cloves hung to air dry before storage, or dehydrated into seasoning powder or flavored salts.
Refrigerators should not be used to store whole, unpeeled garlic bulbs due to low acidity levels that could induce Clostridium botulinum bacteria that cause botulism, which could potentially result in serious food poisoning. On the other hand, however, refrigerators are suitable for storing peeled, sliced and minced garlic products.
Refrigerating garlic shortens its life span significantly, as the cooling period used for store-bought garlic triggers vernalization – an action which prepares it for growth when exposed to warm temperatures such as 60 to 65 degrees – so only lasts weeks in your fridge before sprouting occurs, unlike months if stored at 60-65 degrees.
When preparing garlic for planting, shorter curing times are fine. Still, make sure that you thoroughly clean and remove dirty wrappers before storing. Ideally they should be kept in a dark, cool, well-ventilated location out of direct sunlight until ready to plant them; once planted they require one full week for further curing before use; to speed this process along you can hang up individual bulbs for air drying or build a frame using 1×6 planks and fence boards stretched across sawhorses to speed this up this process
Humidity
Garlic is a root crop with sensitive temperature requirements. For optimal storage conditions, garlic should be placed in a cool, dark environment with moderate humidity levels and proper ventilation to prevent it from drying out or sprouting.
An ideal storage spot for harvested garlic would be in a room in your house that stays cool and dry, with good air circulation to avoid mold formation and shorten its storage period.
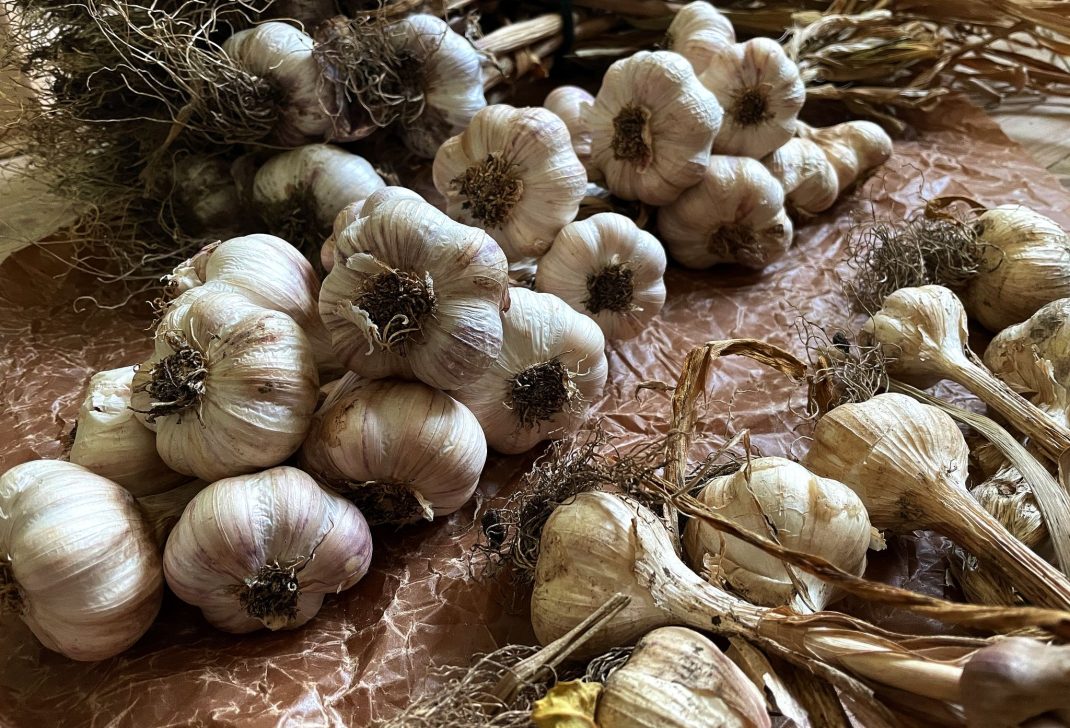
Before garlic can be stored for long-term storage, it must first be fully cured; this usually takes four weeks after harvesting. During this time, its green tops and roots dry out and turn brown while its flavor intensifies further.
Some people leave garlic bulbs in the ground to dry in the sun, which works well in cooler countries or climates; however, it should be used with caution for heavy soil varieties as the bulbs may collapse when pulled from the earth. Furthermore, refrigeration can lead to sprouting.
Stored garlic can be especially dangerous for those intending to make garlic paste or pickling juice with it, due to its low acid levels – something which makes it vulnerable to Clostridium botulinum, the bacteria responsible for botulism food poisoning.
Gardeners seeking to minimize botulism should store freshly harvested garlic at 40oF (4oC), with moderate humidity and good ventilation, for at least six months before peeling for roasting, baking or making other recipes – this will remove the papery outer wrappers while simultaneously decreasing overall odor levels.
Light
Curing garlic before storage is just like curing other vegetables: its energy comes from its leaves and stems to complete its growth, while time in cool, dark conditions allows it to form hard skins that protect its cloves inside from fungi or other garden contaminants. Curing can also help safeguard against fungal infection in your garden – so take the time to dry your harvested garlic properly whether you grow it yourself or buy it at the market!
Ideal locations for curing garlic include areas that receive some natural sunlight but aren’t too warm or bright. Terra-cotta containers designed specifically for this task, as well as old crates, woven baskets, wire baskets or cardboard beer or soda cases could work just as well – just ensure that they have air holes that allow air circulation to ensure humidity doesn’t build up and shorten storage life.
If you want to enjoy the harvest immediately, skipping curing may be best; simply store your garlic in a dark and cool environment for up to one month of storage.
For longer storage needs, hanging your garlic bulbs may be best, though they should be spaced out so as not to come into direct contact. You could also store them in slatted boxes, on trays, in net slings or plaits (similar to what is seen at Italian restaurants), on top of a rack in a garage or well ventilated space – just make sure the garlic doesn’t face direct sunlight as this could cause it to sprout and spoil quickly.
Garlic harvesting should occur in late summer after its lower leaves have turned yellow and begun to wilt, or when its cloves have started filling their skins. As is true of other vegetables, however, garlic cannot be detected visually – only digging up its entire plant will reveal when its time to pick is.
Store garlic at an even temperature for the longest possible life span; however, most homeowners don’t have access to such facilities and therefore a cool dark basement or root cellar with moderate humidity is an acceptable alternative solution.
Air Circulation
Garlic can be stored long term when properly cured and dried. Once ready for use, its outer wrappers should be dry and papery and it should come apart easily. Because bulbs draw energy from leaves and roots during curing, circulation of air should remain free through your bulbs for the best result. The Old Farmer’s Almanac suggests hanging garlic up in bunches to dry indoors for best results; alternatively spread harvested cloves out over several weeks to dry naturally indoors.
As you harvest garlic, be mindful not to bruise its cloves. Doing so could inhibit airflow into the bulb and shorten its shelf life significantly. Furthermore, prevent soil from coming in contact with it; soil can introduce bacteria and fungus that can compromise its quality.
After digging up garlic, brush it lightly but don’t wash it – this could cause it to rot and will block its ability to breathe. For best results, the Old Farmer’s Almanac recommends hanging your harvest up for curing (see Growing Garlic for details), although an open box or wire racks could work just as well for drying purposes. After two or three weeks have passed, check your harvest to see if two or three lower cloves have expanded and skins have dried; harvest as soon as this occurs!
If you need your garlic sooner rather than later, freezing can be the perfect way to preserve its freshness for up to one year – although its texture may change.
Garlic makes a fantastic addition to any home garden, and is easy to grow during either fall or spring. Not only is it delicious and nutritious; growing it yourself allows you to keep fresh garlic close at hand all winter long!