
Elephant Ear bulbs can be easily planted, though it takes some time and attention for them to take root and thrive in their new environments. As these flowers are not winter hardy, containers may prove difficult.
Wilting leaves can be a telltale sign of inadequate lighting, watering and fertilizing of your plants. You can remedy this situation by moving or providing more of these resources – perhaps by moving or transplanting.
Planting
If you plan on planting elephant ears outdoors, select an area that receives 6-8 hours of direct sunlight each day. Elephant ears require enough room to thrive without becoming overcrowded quickly if not spaced out properly. If they seem overcrowded at any point, dig up and replant individual tubers as soon as you notice this situation; doing this can save water and effort while saving both space and effort in future planting projects.
When planting containers, choose a well-draining potting mix rich in organic matter such as compost or humus for optimal results. Clay-based mixes retain too much water and may oversaturate your plantings. Soil should have light to medium texture with slightly acidic soil pH levels; to raise acidity add sulfur, gypsum or garden lime as necessary.
Plant your elephant ear bulbs by burrowing their tubers 2/3rds deep into the soil with their pointed ends pointing downward, using a planting stake or marker as a reminder. Your plant may take several weeks before emerging from its restful confines depending on weather conditions and sunshine exposure.
For maximum success in growing these plants quickly and successfully, planting bulbs in spring when soil temperatures are warm is best. However, seeds or tubers can also be started indoors in late winter or early spring before moving them outdoors once outdoor conditions have stabilized.
When planting Colocasia or Alocasia plants, make sure they are at least 3 feet apart. As these fast-spreading runners may spread across your entire garden quickly, you do not want them to overlap or take over! Too close together also means they may compete for water and sunlight from one another leading to poor growth or even rot; alternatively divide matured plants after they reach maturity and replant them elsewhere in your garden or containers.
Soil
When planting elephant ear plants in containers, make sure that a well-draining, fertile potting mix is used. Since tropical elephant ear plants tend to grow quickly and require plenty of water for nourishment, it should hold onto moisture without becoming soggy or dry. Some potting mixes also contain vermiculite which is helpful in maintaining soil moisture levels and helping retain its health.
Once the soil is prepared, dig holes 4 to 6 inches deep and twice as wide as each bulb, spaced at 2 to 4 foot intervals so each will have enough room to grow and mature. Place one bulb per hole with its pointed end pointing up, covering it with soil while pressing lightly so good bulb-to-soil contact is maintained.
Once planted, elephant ear plants are generally straightforward to care for. As they thrive in warm weather conditions, frequent watering is needed to keep the soil moist – this is particularly crucial if they receive full sun as lacking adequate hydration can quickly lead to stressing the plant out.
As with caladiums, elephant ear plants are not winter hardy and should only be planted after frost has subsided in spring. If you wish to enjoy their tropical beauty in your garden during the colder months, however, one or both methods for overwintering them could work effectively.
Transplanting tubers after their foliage has died back at the end of fall is the easiest method. Be sure to wear gloves as tubers can be poisonous. Dig up any clumps and brush away any dirt before placing in a cardboard box filled with slightly damp peat moss or vermiculite for storage in a cool, dark place until spring arrives.
Another method of starting elephant ear plants from seed is seed sowing. This method requires less labor-intensive steps but may take longer for your plant to flourish. When growing from seeds, scatter them onto seed-starting mix and cover them with an even layer. Mist it regularly to keep the mixture moist but not soggy.
Watering
Although elephant ears can be grown from seed, they are also popular annuals in colder climates. When starting elephant ear bulbs either in pots or garden beds, they require rich soil and full sunlight in order to thrive. Indoors, water when the top 1″ of soil dries out; overwatering could result in root rot or fungal growth if overwatered for too long; outdoors, keep the soil moist but not soggy.
Plant the bulbs with their flat end facing up when planting in the ground; for containers, add 4 inches of soil in the bottom. Nestle your tuber into this layer with its bullseye facing upward and then cover it with more soil mix as usual – be careful not to bury your bulb too deeply as that could delay its appearance!
Once your elephant ear bulbs have been planted, water them regularly until the plants start to sprout leaves and start growing. As winter draws nearer and temperatures become cooler, reduce how frequently you water. Don’t be alarmed if some parts go dormant – this is part of their natural cycle!
While your plants are dormant, use a balanced water-soluble fertilizer with nitrogen, phosphorus and potassium content for fast growth. Doing this once or twice every month should do just the trick!
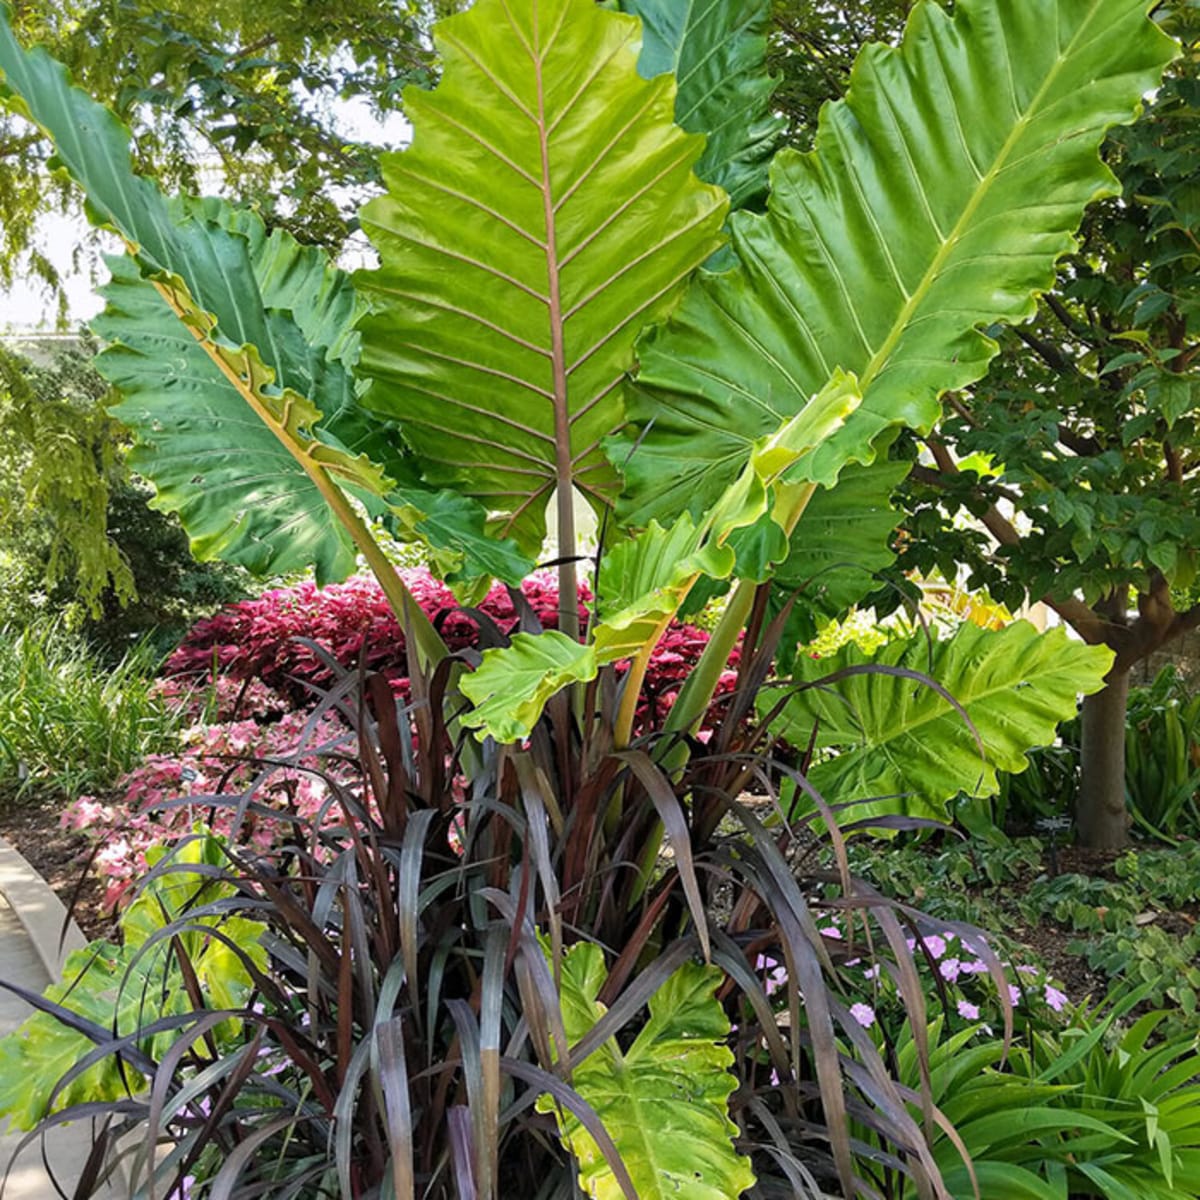
Once the weather warms up, elephant ear plants flourish quickly and blossom beautifully. Not only are they beautiful additions to any tropical garden but they can also look wonderful in pools, spas and water gardens as accents or as softening walls and fences by lending an exotic vibe.
As soon as frost threatens, cut back the leaves and bring them inside as houseplants. Or dig up corms and store them away until spring replanting in their original spots. Or let the plants die naturally outside until spring planting time comes around again; but be sure to overwinter your bulbs properly if this option is chosen to avoid frost damage!
Fertilizing
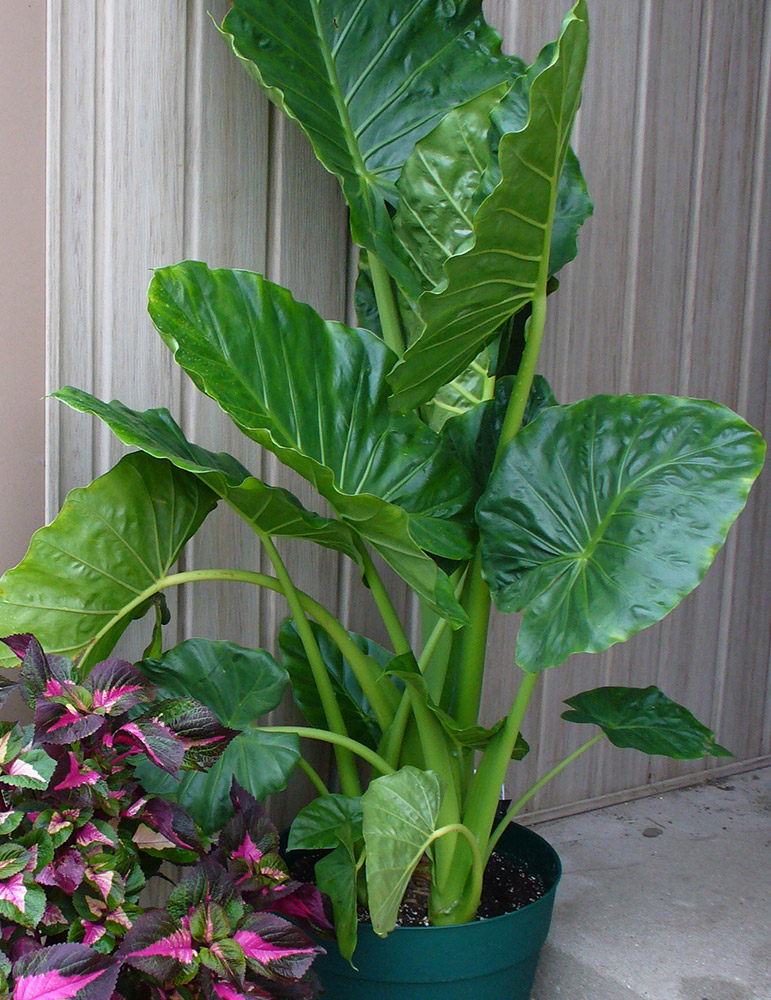
Elephant ears (Colocasia esculenta, commonly referred to as coco yam or wild taro) are tropical plants with heart-shaped leaves in various colors and forms that grow abundantly. Used often as focal plants in containers, poolside settings or riparian environments – even indoors! However, their cultivation requires constant sunlight.
Plants with fleshy roots and large stems such as spider plants require heavy feeding. When planting in well-draining soil mix, water must be applied regularly in order to keep the soil moist but not soggy. A 20-20-20 balanced water-soluble fertilizer should be applied twice monthly from spring through fall for best results; during dormancy periods in winter you should gradually decrease its water supply and discontinue feeding it altogether.
Though bulbs can be planted directly into the ground in warm regions, containers with wide drainage holes are generally preferable for them. Fill your container with organic-rich potting mix, dig a hole three-quarters up the container wall to accommodate the bulb and ensure its small nub is facing up when planting it – then cover it up with more soil mix!
If you are sowing bulbs from seed, sprinkle the seeds across a planting tray containing well-draining seed-starting mix and gently sprinkle more onto them without completely covering them with soil. Mist with water from a bottle before misting again using another misting bottle and placing your tray somewhere that receives indirect yet bright lighting for at least three weeks to allow seedlings to emerge.
Once established, transplant the plant’s large leaves to a larger pot; just be careful not to place it directly under direct sunlight as this will lead to scorch damage. When autumn rolls around, cut back foliage and allow tubers to dry before bringing inside for winter storage – either peat moss or dry potting soil will do just fine – then replant after frost risk has passed in winter.