
Potting benches provide an ideal work space in any greenhouse, shed or garden. Available in various sizes and designs – some even including shelves and drawers! – these benches make perfect additions for greenhouses, sheds and gardens alike.
This DIY potting bench provides you with ample lower storage and working surface, including a grated area that lets excess potting soil drain off into an under-bench bin.
Legs
Are You A Gardener Looking for a Potting Bench? A quality potting bench is essential for gardeners of any level of experience, providing not only somewhere to work but also somewhere to store tools, soil and gardening supplies. Solid and sturdy models with lower shelves for storage provide optimal conditions. Many feature wide working surfaces.
To build an easy potting bench, all that’s required are some basic tools: a circular saw, miter saw or table saw for cutting grate slats and ladder. Finally, it would be wise to stain it with an outdoor-grade wood stain finish when finished.
This potting bench showcases an Arts and Crafts style design, making it both beautiful and practical. It boasts a tiled work surface as well as upper and lower storage areas – ideal for intermediate carpenters to try their skills at. Plus, there is even an extensive list of supplies and cutting requirements!
For an even sturdier potting bench, this design utilizes 2x6s for its leg frames. Though more difficult than other designs to construct, the instructions provided by this potting bench are clear and straightforward – including room for hooks along its back wall and taller lower shelf space.
To link the leg frames, long rails will be necessary – 2x4s or 2x6s work fine; just make sure they are of equal length so your bench stands upright when assembled. When connecting these long rails together, using a level is most efficient instead of using a carpenter’s square.
Once the long rails are assembled, it’s time to build your bottom shelf. To do this, measure from the ground to each of your back legs’ top edges; subtract 8″, and that will give you your measurement for bottom shelf boards; cut 3/4″ plywood accordingly and screw into position. As added support, install a front bib that fits between legs for additional support and consider using 1x material as shelf supports. Now it’s time to get gardening! Once your shelves are in place and installed – start planting!
Top
Basic potting benches typically consist of a counter for mixing soil and several storage shelves where you can stash gardening tools. But you might also want to include additional features, like adding a sink for rinsing plants and a grate to collect soil scraps. A custom-built potting bench is simple to create on your own when using an old piece of furniture with built-in storage shelves and chicken wire cabinet fronts like an old hutch as the basis.
Building a potting bench requires basic carpentry skills and several key tools. A tape measure, large and small squares and chisel will come in handy; miter saw and table saw can make critical cuts easier – however if these saws are unavailable they’re available at most lumberyards; most other tasks only need simple hand tools like hammers and nails for completion.
Once your potting bench back has been assembled, the next step should be adding long rails that link its frame pieces. 2x4s or 2x6s typically provide the best results here, for optimal results install these rails 27 inches from where your legs end to ensure an overall height of 68 inches upon completion of this step.
Assemble the rest of the bench by installing two 85″ boards 35 inches apart at an offset of 35″, then centering one 60″ board between them, before attaching them to your back legs at 30″ intervals. Finally, build up the front of your potting bench by attaching two more 85″ boards on either side of a 30″-center board for easy assembly.
Once your back wall, side walls, and bottom shelf have been assembled, it’s time for the final step: adding a bottom shelf! Use 1x material like countertop material but cut it so it fits between legs instead of on top of them – to ensure an easy install process and leveled result. For optimal results, install your shelf after your potting bench has been fully assembled and leveled.

Sink
Sinks can be invaluable additions to a potting bench. Not only will it make clean up easier and store soil more effectively, they’re also great for saving space on your benchtop! Installation options range from flush with benchtop or on top (as in this example) but in both instances be sure to include drain and/or water-resistant seal.
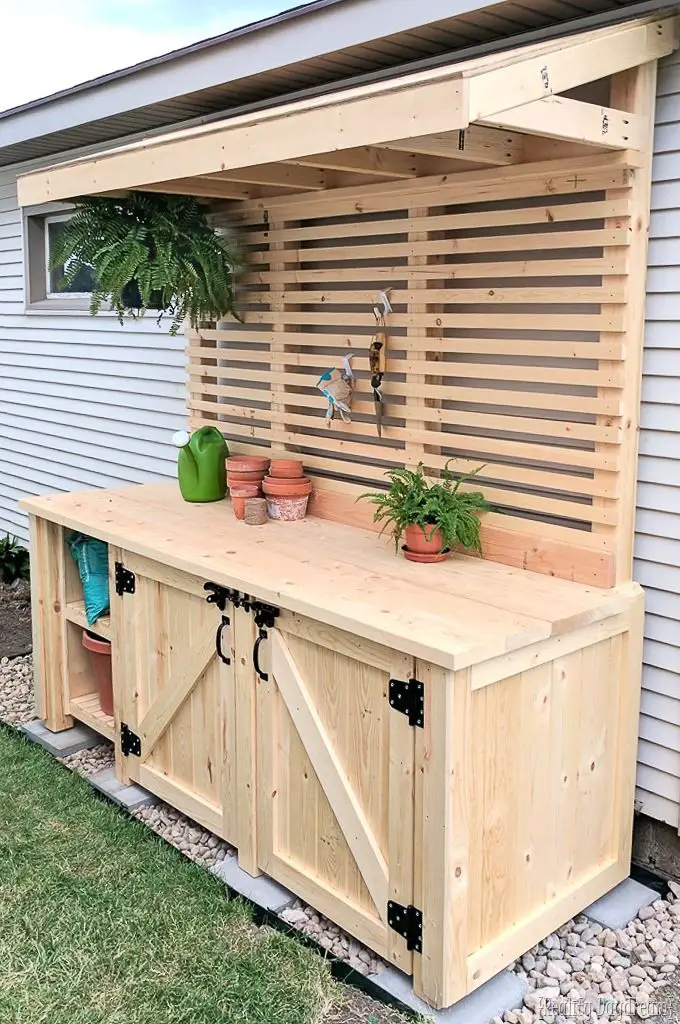
A well-designed potting bench should feature ample storage. This allows supplies and tools to stay at hand rather than gathering dust in dark corners of your garage, so you can spend more time planting, pruning, and repotting plants. This particular model features upper and lower shelves as well as a slatted top for excess dirt to collect on its shelves.
Install a storage bench back with cabinets attached. In this example, these are salvaged door and cabinet frames; you could just as easily construct them yourself from reclaimed lumber or fence pickets. This design includes space for a sink as well as open and closed shelving to store various supplies.
If you’re searching for an inexpensive, yet easy way to construct a potting bench, this free plan could be just what you need. While not the most attractive bench on the market, it does provide an efficient workstation for planting and repotting.
This intermediate project combines a potting bench with a workbench to give you a spacious surface for gardening activities such as potting. Its sturdy frame is composed of 2×4’s and pressure-treated plywood, featuring a lower shelf for storage purposes. You can customize this potting bench as needed by incorporating vises or tools for specific types of work into its design.
This potting bench features an old headboard that’s been painted or stained to complement its surroundings, providing ample working surface, pegs for hanging your tools and gloves, bottom shelf storage space and drawers, plus an angled back to help contain mess during potting sessions.
Storage
Many potting benches offer various storage solutions, such as built-in drawers and shelving. Other features might include a flat work surface with sifting surfaces or even an integrated sink that supplies running water; others even have a slatted working surface that allows excess soil to fall through into an easily removable storage bin below; still others provide smooth surfaces which are easy to wipe clean.
Simple potting benches can be constructed out of rolling tables, bar carts or similar items that take up minimal space while offering both storage and work surface functionality. When not needed they can simply be rolled away out of the way when not required. More elaborate benches may require custom designs built from scratch utilizing wood that can withstand repeated exposure to moisture and sunlight such as red cedar or pressure treated wood for increased longevity.
Permanent garden potting benches can be made of materials like cedar, cypress or oak; redwood is another great choice as it naturally resists rot and insect damage. When selecting the height for a potting bench it’s also important to choose an ideal material: too low can result in you stooping over while working while too high may obstruct vision while gardening.
A potting bench that doubles as a planter saves space. It can accommodate large plants while still serving its primary purpose of protecting roots from frost. Another possibility for building your potting bench would be using old furniture like desks, dressers or tables; these pieces can then be painted, stripped and refinished to blend in seamlessly with your backyard decor.
Building a potting bench is an excellent project for intermediate carpenters. While basic tools will suffice, miter saws will come in handy for cutting slatted ends; however, table saws may also be needed to cut grated slats which may need to be purchased from lumber yards and cut on-site.