Blog

  • What Does a Crabapple Look Like?

    What Does a Crabapple Look Like?

    Crab apple trees are perennial favorites due to their beautiful spring flowers, summer fruits and fall foliage displays. Furthermore, these evergreen trees add year-round interest with their various flower colors, fragrances, sizes and tree forms that give it year-round appeal.

    “Adams” boasts gorgeous pink buds that bloom into pure white fragrant blooms in early to mid spring, providing great food sources for birds in early fall and throughout winter. Fruits also remain to provide food sources to wildlife during their migratory journeys.

    Leaves

    Crabapple trees are deciduous plants, meaning that their leaves drop every winter. When spring arrives, however, their colorful blossoms attract bees and other pollinating insects; their delicate pink or white blooms often draw bees and other pollinators towards it. Furthermore, the fruit from crabapples attract birds, deer, and squirrels for feeding purposes.

    Crabapples have numerous leaves with different colors and shapes that vary based on various factors. But leaf shape is usually an accurate indication of which species or cultivar it belongs to; crabapple leaves generally range from being egg-shaped (widest near the base) to elliptic in shape with acute tips and serrated margins; their foliage often shows shades of green while other cultivars display bronze tints during summer months.

    Branching of a crabapple tree adds another element of beauty. Branches tend to spread outward from its trunk, though some may ascend or descend and create weeping effects when bent low enough. Collectively, their branching forms a dense crown for privacy and structure in your garden.

    Crabapple leaves can also vary in size and shape depending on their type of tree; weeping crabapples typically feature smaller and thinner leaves than their rounded counterparts.

    Spring Snow’ crabapples boast bright medium green leaves with acuminate or acute tips and serrated edges, suitable for growing in northern climates and possessing good resistance against scab, fire blight, cedar-apple rust.

    Flowers

    Crabapples are an unforgettable spring sight, boasting delicate colors as their buds open into bloom and spread. Meanwhile, their foliage provides a vibrant spectrum of hues throughout summer; some cultivars even display beautiful autumn displays!

    Crabapple flowers come in single, semi-double and double varieties and may feature single-colored petals, stripes or fringed or solid hues. Their clustered blooms, known as corymbs, can appear close to branches. Bisexual blossoms contain male and female organs (anthers and stamens). Finally, crabapple petals often possess clawed shapes at their bases where they attach to the receptacle for easy harvesting.

    While crabapple flowers are beautiful, their lifespan is short lived and pollinators often cause damage to trees with pollen-laden blooms that become unsightly blemishes. Depending on which variety is planted, blossoms could be white, pink or red in hue with subtle fragrance.

    Flowering crabapples can be an attractive feature in the landscape, providing early spring beauty while brightening shady areas with their vibrant color displays. Crabapples come in all sizes–from dwarf trees to larger shade trees reaching 40 feet tall–and their flowers and fruit can provide food sources for birds during winter.

    Flowering crabapples are native to the southeastern United States and widely popular landscape trees. From urban to rural settings, homeowners and gardeners alike love them as an ornamental addition.

    The crabapple tree is an easy and resilient plant to cultivate in most climates, with low chilling requirements and resistance to apple scab, fire blight, cedar-apple rust. Cultivar options available for southern gardens include Adironkak with white flowers and orange fruits on an 18-foot tree and Robinson with pale pink blooms and bronze leaves growing 25 feet high; Callaway and Harvest Gold varieties also make excellent choices for southern gardens.

    Fruits

    Crab apples (Prunus malus) are an extremely varied genus of cultivars that range in sour and bitter taste, yet make delicious jelly or jam when mixed with sugar. Crab apples also make popular ornamental landscape plants where their flowers and fruit add visual interest from spring through fall – as well as their upright branches offering winter interest in gardens or patios.

    Crab apples can make great additions to any garden, be it as an accent plant or shade tree. Common varieties, like the ‘Sargent’ crabapple, typically feature tall and wide canopies of green leaves during the summer, followed by abundant, shiny red fruits in autumn. Other varieties, like Lollipop crabapples are ideal for smaller spaces like patios as their narrow crown and low leaf drop allow for easier care.

    Crab apple leaves may be oval, ovate (egg-shaped and wider at their base than their tip), or elliptic in shape with serrated edges and acute to obtuse tips. Their colors may help identify each variety but often their shapes play more of an essential role; many top-grafted varieties also boast weeping habits which add another level of attraction.

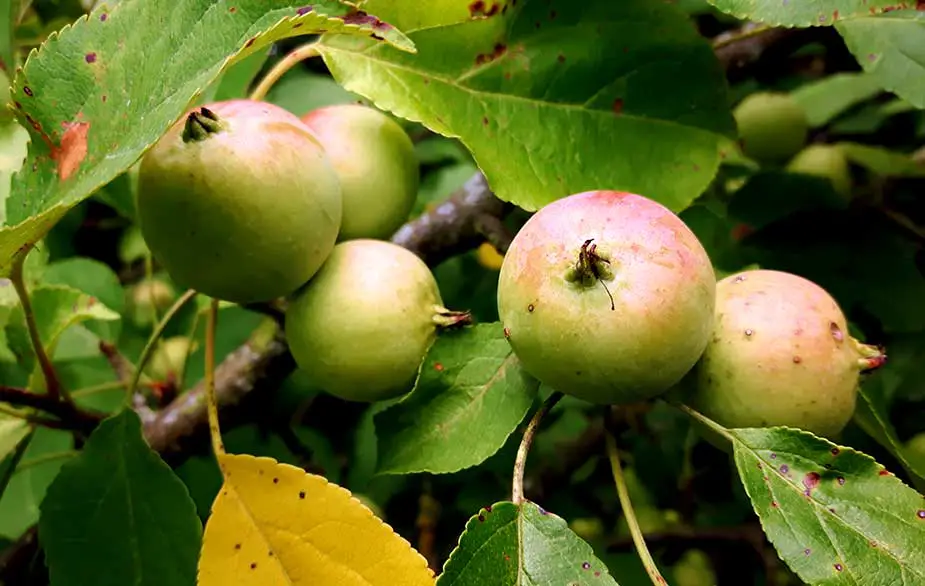
    Crabapples produce bright red fruits that may also be yellow or orange in hue, making for an interesting variety of autumn harvest cleanup. Some crabapple varieties such as Scarlett produce white flowers in spring before producing vibrant red, orange and yellow fruits a few months later; other options, like Spring Snow (fruitless variety) offer no fruit at all – making these plants great options for gardeners who wish to avoid messy fall cleanup or have small children who could mistake them for apples and consume them unknowingly.

    The “Lollipop” crabapple is a top-grafted dwarf tree with an upright, rounded branching habit, which typically reaches 15 to 30 feet in USDA zones 2-8. It produces dense clusters of pink flowers in spring that attract butterflies and hummingbirds; additionally its bright red pomes that reach 1/2″ diameter are immensely popular with birds.

    Trunk

    Crab apples come with various trunk forms; from round to ovoid and thin in diameter to thicker, sturdier and upright forms. Pacific crabapple (Malus sieboldii), with its tall trunk of up to 30 feet can reach 30 feet tall while others, like Callaway crabapple (Malus callawayii), have more vertical forms reaching 25 feet high; other cultivars like Red Splendor or Beverly may feature rounder forms with dense branches resembling semi-weeping effects for semi-weeping appearances.

    Crab apples come in various tree shapes, flower colors and fruiting habits that set each variety apart. For instance, the prairifire crabapple (Malus prairifir) features deep pink flowers with masses of purplish-red fruits that attract birds. Its foliage emerges purple before turning bronzy green before eventually taking on yellow, orange and red tones by falltime – as well as exceptional resistance against fire blight, cedar-apple rust and powdery mildew.

    Other crabapple trees, such as the Lollipop Crabapple (Malus ‘Lollipop’), feature compact, rounded shapes that require minimal pruning. This cultivar combines beauty and versatility as it can serve both as a shrub or small tree depending on its usage; being grafted means it must be planted within its zone to remain resistant against cold and heat conditions.

    Many crabapple trees are susceptible to the frogeye leafspot disease, where leaves develop purple spots resembling the eyes of frogs before eventually wilting and disfiguring. This wilting affects not only its overall appearance but productivity as well as yield.

    Appletree Borer (Chrysobothris femorata), is another disease that threatens or kills crabapples, tunnelling beneath their bark to cause cracks in major branches or kill entire trees. A healthy tree may ward off this pest without assistance; otherwise you should spray with insecticide regularly or even consider cutting down damaged portions to make room for new growth – although this process could prove time consuming and labor intensive, but well worth your efforts!

  • How to Care For Jasmine Plants

    How to Care For Jasmine Plants

    Jasmine plants should be placed in sunny spots with well-draining soils. When planting in heavy soils, add grit to improve drainage; use well-rotted manure or compost as mulch in autumn to protect roots.

    Plant jasmine varieties on trellises and prune them regularly to manage growth. Prune after flowering to promote reblooming and pinch stems for further branching.

    Watering

    Jasmine plants thrive in warm temperatures and high humidity levels, making them perfect for indoor growing. If you want your plant to flourish indoors, provide it with plenty of indirect light and humid conditions; cold drafts or sudden temperature shifts could cause its leaves and flowers to wilt prematurely. Also avoid placing it directly under radiators or air vents as these could dry out the soil over time; misting with neem oil or using humidifiers can help increase humidity in the air around it.

    Jasmine plants require well-drained, porous soil with plenty of organic matter enriched with compost improver like Scotts Osmocote Compost Premium Soil Improver before planting to add organic material and promote healthy growth. If planting vining jasmine vines, ensure there is a sturdy trellis or archway available so they can climb as they mature.

    When watering a jasmine plant, examine the top two inches of soil for moisture levels. If the surface appears dry and any puddles form, add enough water until its surface has become damp again and fill any puddles that form. Avoid overwatering as overdoing it can lead to fungal diseases and only water once every few weeks during dry spells.

    Keep an eye out for signs that your plant requires water, such as drooping leaves or slow growth. If its leaves turn brown or powdery, this could indicate fungal disease requiring treatment with fungicide. If jasmine flowers aren’t producing as many buds, this may indicate fertilization needs.

    For optimal results, fertilize your jasmine regularly during spring and summer with liquid fertilizer containing high-potash levels of fertilizers such as nitrogen-rich products that encourage leggy growth that won’t support its blooms. If starting from seed, sow seeds three months prior to your average last frost date in small containers filled with nutrient-rich potting soil; soak for 24 hours then place under plastic domes to sprout in direct sunlight.

    Fertilizing

    Jasmine plants require regular fertilization whether grown indoors or out to ensure healthy growth and blooms. A water-soluble, balanced fertilizer should be applied every two weeks from spring through early fall for best results; after this point you should reduce or discontinue feeding to avoid salt buildup in the soil that could damage roots. When applying liquid fertilizers, referring to their label for rates and dilutions is also helpful.

    Outdoors, grow vining jasmine near a fence or trellis and provide them with support structures as needed to keep them upright. When transitioning indoors, carefully cut back foliage to reduce plant size before moving it to its final container.

    Repotting is best done in an open hole dug large enough to fit the root ball and filled with well-rotted compost or manure that has had time to break down, adding grit where necessary to improve drainage. After adding moisture via irrigation or misting, water the soil and add layers of mulch or leaf mold for extra humidity retention. Do not disturb too many roots when repotting; otherwise they may break apart and cease growing altogether.

    Indoors, make sure the planting area has ample light and circulation of air, with temperatures that are cool but warm enough for plant growth. Humidity should also be taken into consideration; try placing the pot on a tray of pebbles filled with water or using a humidifier; once the top inch of soil dries to touch, water gently until saturated.

    Watering indoor houseplants too infrequently is a common challenge, but jasmine requires special consideration as too little moisture can cause it to wilt and cease producing flowers altogether, while too much could lead to root rot and eventually cause its death.

    If your jasmine plant is failing to produce flowers, this could be caused by either inadequate sunlight or too much nitrogen in its soil. Switch to a fertilizer with less nitrogen and more flower-boosting phosphorus content while watering more regularly for best results.

    Like other tropical houseplants, jasmines can also suffer from many of the same challenges. Be wary of any signs of powdery mildew forming on its leaves – if this happens regularly apply biweekly sprays of insecticidal soap or neem oil to protect it. Other pests that may invade include aphids and spider mites.

    Pruning

    Jasmine plants thrive in warm and humid conditions, yet require regular care and maintenance in order to remain healthy and blooming. Regular pruning helps control plant size, encourage branching, and ensure full blooming potential. Utilizing proper tools with sharp edges makes pruning indoor jasmine an effortless task bringing beauty and fragrance into any room in the home or office.

    Pruning an indoor jasmine plant should ideally take place during the early spring, before new growth begins to appear. This allows it to recover from last year’s flowering and prepare for another productive blooming season. However, if it becomes overgrown or leggy at any other time during the year, further trimming might be necessary to help maintain its shape and maintain the overall look of its blooms.

    When pruning your jasmine, use sharp and clean tools in order to avoid damaging its stems and branches. Also cut back any dead, damaged, or diseased sections as this will help stop further spread of fungus or pests across its entirety.

    As well as pruning, jasmine plants should also be watered regularly and fertilized with an appropriate fertilizer to ensure consistent growth and the appearance of beauty in their bloom. By keeping soil moisture levels consistent and fertilizing regularly, you’ll ensure optimal conditions for healthy and beautiful jasmine flowers to bloom.

    Indoor jasmine plants are easy to care for, as they adapt easily to changing temperatures and conditions. To maximize blooming success, it is important to provide them with adequate lighting, airflow and proper drainage in a draft-free environment.

    Finalize by trimming any brown leaves, while keeping an eye out for pests such as spider mites that leave reddish-orange spots on jasmine leaves. An insecticide soap or neem spray can provide additional protection from these harmful invaders.

    For a fragrant yet hardy indoor plant that can last through the seasons, winter or summer jasmine may be just what you need. Winter jasmine should be planted during fall planting season while summer jasmine can be planted anytime between spring and autumn. Both species can also be trained as climbers by tying to a trellis or fence as support structures.

    Light

    A jasmine plant adds romance and elegance to any room or garden, whether climbing over a trellis or trailing over walls. Flower enthusiasts appreciate its fragrant blooms; care of this species will depend on both climate and species – consult your local nursery for advice about which variety would work best in your environment.

    Indoor jasmine plants thrive when exposed to at least six hours of direct, indirect sunlight daily and grown in soil that’s slightly acidic and well-drained, such as with bark or peat as organic matter in their potting mix. Repotting should occur every three years to avoid rootboundness; an ideal time is after new growth appears each spring.

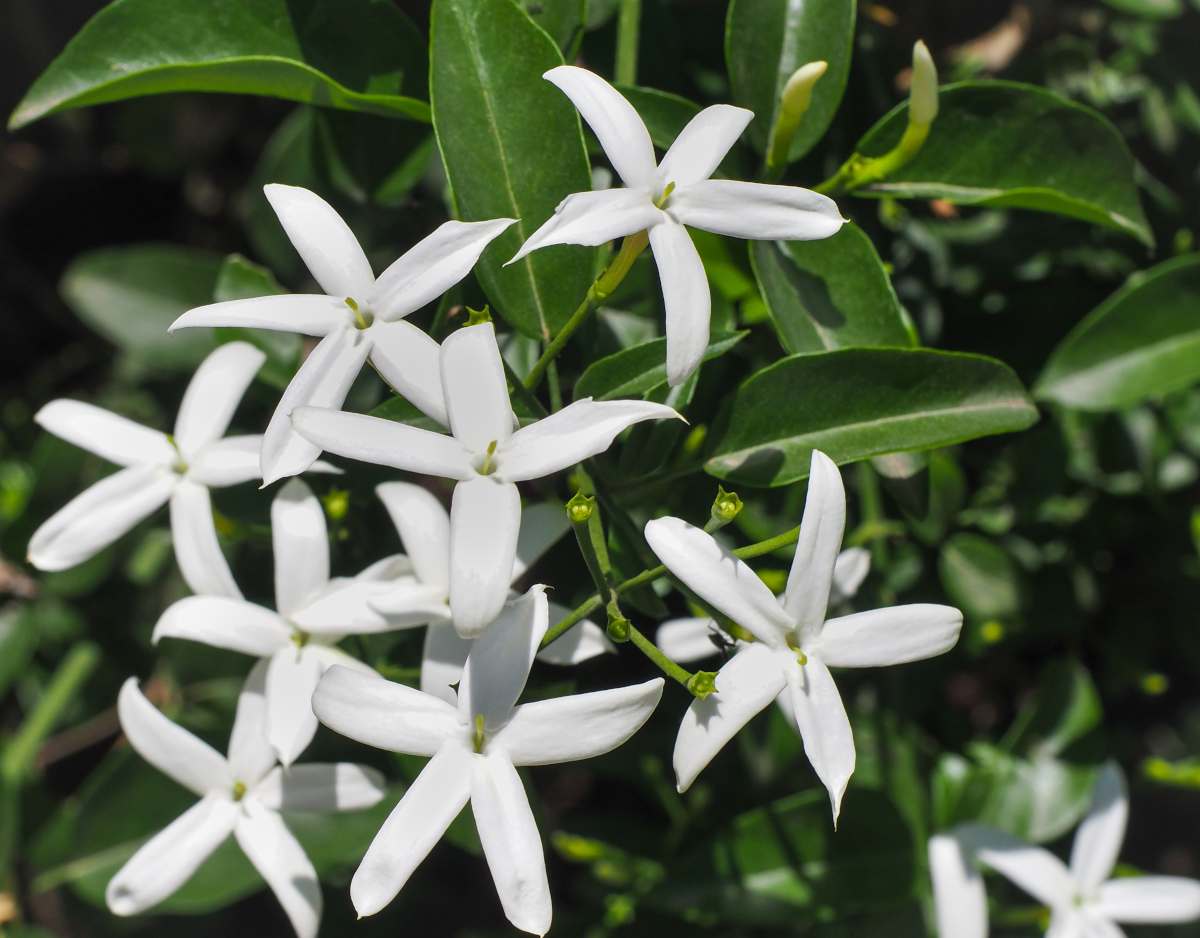
    Some varieties of jasmine bloom all year, while others bloom only during specific times. For example, winter-blooming ‘Jasminum polyanthum’ produces beautiful sweet-scented blooms from late winter through spring that look fantastic when grown as twining vines in hanging baskets or decorative trellises.

    All jasmine plants benefit from warm temperatures, but some varieties can become damaged by frost or cold temperatures. Some species, however, can withstand frost damage better than others; the Arabian jasmine (Jasminum trifolium) for instance is more tolerant of cooler climates than its counterpart, the common jasmine (Jasminum officinale).

    To propagate a jasmine plant at home, take six-inch stem cuttings from an adult specimen and dip each in rooting hormone for two or four inches, spacing them two to four inches apart in moist sand or vermiculite 2 to 4 inches deep. After four to five weeks check roots by transplanting cuttings into individual 4-inch containers of potting soil.

  • How to Kill Nematodes

    How to Kill Nematodes

    Nematodes cause widespread plant damage by puncturing cell walls and sucking out their contents, so organic growers should practice crop rotation and use anti-nematode controls like French marigold cultivars Tangerine and Petite Harmony as means of control.

    Nematode damage may not be visible to the naked eye, so confirming an infestation requires sending soil samples for testing by a laboratory specialized in nematology. Your local county or state Cooperative Extension offices may be able to recommend commercial laboratories.

    Soil Composting

    Soil composting has proven itself an effective means of controlling nematode populations, while simultaneously improving soil structure and increasing beneficial microbe populations in the soil. Compost also contains plant-derived nematicidal compounds which have proven extremely successful at suppressing nematode populations.

    Many gardeners turn to organic solutions for controlling nematodes, such as composting or crop rotation, as a more natural and straightforward means of control than synthetic methods such as DDT. Though this approach takes more patience and perseverance to implement, organic controls often work effectively against this problem.

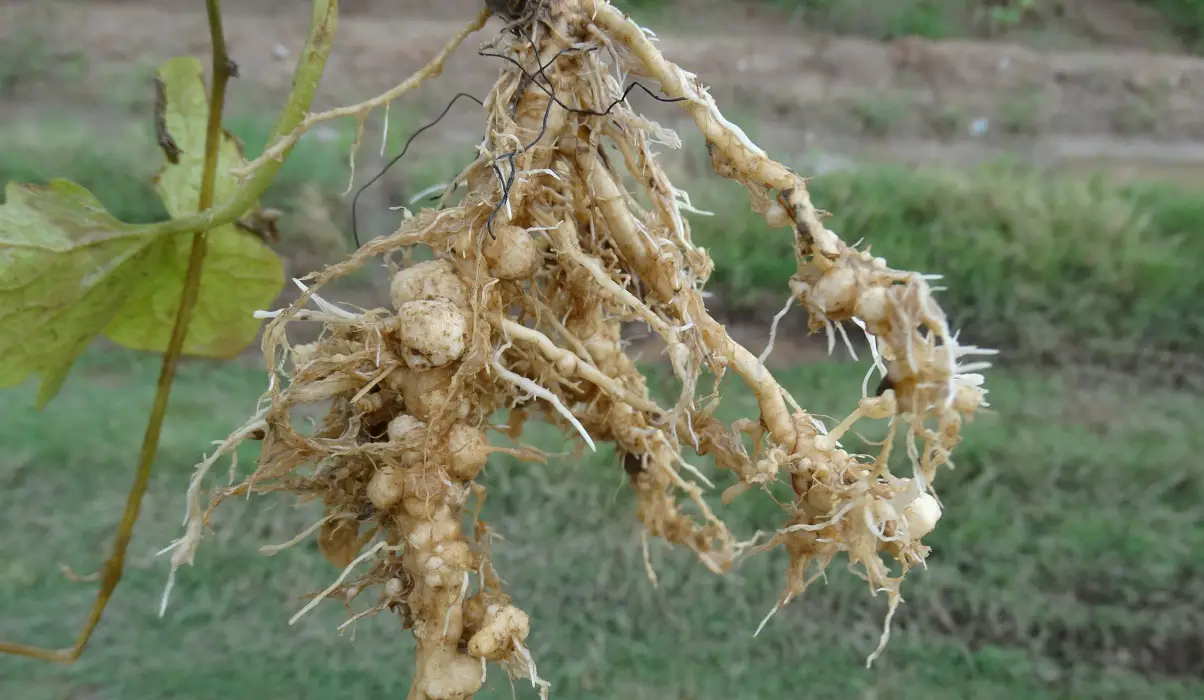
    Nematodes are microscopic roundworms found in soil that live and attack plant roots. When attacked by these parasites, their pincer-sharp mouthparts pierce through to cause the host plant’s roots to produce galls that restrict water and nutrient movement; ultimately resulting in stunted growth and decreased productivity.

    Some species of nematodes are more damaging than others. Nematodes that attack tomato plants form cysts around their roots that prevent them from taking in essential nutrients for growth – known as Meloidogyne incognita root-knot nematode is one of the most serious vegetable nematode pests.

    Gardeners looking to reduce nematode populations can add organic matter, like rotted manure, composted yard waste or sawdust to the soil. Such materials contain fungi and bacteria which compete with nematodes for sustenance – starving out their population over time. In addition, organic amendments provide essential nutrients that improve soil conditions.

    Other methods for controlling nematodes include planting varieties of vegetables, fruits and flowers that are resistant to them; these crops include corn, millet, grain sorghum, asparagus, chrysanthemums and zinnias. Gardeners may also utilize cover crops like marigolds or sudangrass which contain toxic substances that will reduce nematode populations; black walnut leaves contain an ingredient called juglone that is toxic to nematodes – this compound has also been included as an ingredient in organic products which reduce nematode numbers further.

    Nematode Baits

    Meloidogyne species nematode infestation can wreak havoc on vegetable crops and ornamental plants alike, leaving many vulnerable. These microscopic roundworms live within plant roots rather than aboveground; making identification challenging. Once in one garden they spread easily by way of tools or boots as well as direct contact between infested plants; similarly Tylenolone tabacum potato cyst nematodes may also prove disastrous to crop production.

    Entomopathogenic nematodes are naturally occurring microorganisms that prey upon soil-dwelling insect pests in their larval and pupal stages, providing an effective alternative to chemical insecticides in gardens, lawns, greenhouses, orchards, vineyards and row crop environments.

    ARBICO provides an array of nematode products designed to control pests in gardens, lawns, orchards, vineyards, row crops and more. Our Beneficial Nematode Selection Chart will assist in selecting the appropriate nematodes to use against particular pests while our product pages feature instructions, temperature ranges and storage information on each product page.

    Not only can organic matter help plants that are beneficial to nematodes, it can also increase predators of these pests such as springtails and carnivorous fungi that can control nematode populations. Furthermore, adding more organic matter can create rich soil which encourages root development further minimizing damage caused by these parasites.

    When using nematode baits, it is vital that all instructions and recommended bait materials are strictly followed. Crushed egg shells, sand, grass clippings, castor pomace (a byproduct from producing castor oil) and manure may all serve as suitable materials; the most successful baits contain organic material as well as a high percentage of worms.

    Once baits have been prepared, they should be stored in a large Petri dish at room temperature and labeled with information regarding the strain or species being isolated. After an appropriate amount of time has passed, infective juvenile forms will begin emerging from within the baits – these nematodes can then be harvested by taking out of their larger Petri dishes and pouring out into beakers for harvesting.

    Nematode Traps

    Nematodes are microscopic roundworms found in soil. These microscopic nematodes cause serious crop damage worldwide and four species, known as root knot nematodes, in particular are especially destructive; killing or seriously debilitating plants as they go. Nematodes can also contribute to stunted growth or root rot causing further issues for gardeners.

    To effectively kill nematodes, they must first be captured by a nematode-trapping fungus with an attractive carbohydrate-binding protein or lectin that captures and traps them. Such trapping fungi have proven highly successful at killing these pesky bugs.

    Fungal parasites attach themselves to the cuticle of nematodes and penetrate it, paralyzing and sucking out their internal contents. Fungus then grows up around them and forms a bulb-shaped structure around it before finally killing off their target and releasing more spores into the soil that continue trapping additional nematodes.

    An effective nematode trap can be constructed easily. All it requires is a shallow pan with an open bottom, some cardboard or mesh bag for drainage and some spores for trapping nematodes; either purchased from gardening suppliers or mixed into water in a bowl until it becomes pasty.

    Mix the resultant mixture in your container with enough water to fill it, stirring thoroughly as you add more. Apply this solution directly onto the soil where nematodes have taken root; be sure to keep the soil moist and warm until you see an effective change.

    Nematode traps can also be created from oyster shell flour, which has proven itself extremely effective against nematodes. Oyster shell flour contains the natural compound juglone which is toxic to nematodes – providing a cheaper alternative than more costly organic products. Black walnut leaves and hulls also contain naturally occurring substances containing juglone which have proven very successful at eliminating root knot nematodes.

    Before applying nematodes to your garden, be sure to read and follow the label instructions, selecting the most effective species for your needs. Different nematode varieties target different pests and diseases in different areas; referring to the Beneficial Nematode Application by Crop Chart will help identify which ones would best match with your plantings.

    Solarizing

    Most gardeners are familiar with plant damage caused by insects and diseases, yet few realize that nematodes are also an ongoing threat for many plants. Nematodes are microscopic worms found living in soil environments which feed off living plant roots by puncturing cell walls with an oral spear-like stylet to cause permanent root damage resulting in weakening or death of these living plant roots. Unfortunately, diagnosing this damage is often challenging due to symptoms like stunted plant growth which could also indicate drought stress, disease or insect infestation among many other issues.

    Nematodes are sensitive to heat, making solarization an effective means of control for these pesky bugs. Solarizing requires covering soil with clear (for best results) or black plastic for several weeks or months to trap heat in and heat it to high temperatures – killing not only nematodes but many other soil pests and weed seeds down to 8 inches deep!

    This method works best in beds receiving full sun; it won’t be as successful in shaded areas of your garden or those surrounded by trees. Furthermore, it’s essential that both before and after covering it, water should be applied liberally so as to stop any nematodes escaping and reaching deeper soil layers.

    After solarization, it is crucial not to till or mix the soil as this could allow nematodes to recolonize. To ensure they have died completely, soil must be immersed in hot water heated to 105 degrees Fahrenheit for three to four hours in order to fully destroy all cysts associated with them and ensure full removal from soil.

    Another effective method for eliminating nematodes is planting cover crops like oats, alfalfa or turnips between each year’s vegetable crops to enrich the soil, control weeds and reduce nematode populations while providing natural compost to any organic garden. Marigold flowers have proven particularly successful at combatting root knot nematodes as their petals produce compounds toxic to these nematodes.

  • Best Perennials to Plant For a Long Fall Blooming Season

    Best Perennials to Plant For a Long Fall Blooming Season

    Sweet alyssum is an easy-care perennial with flowers in shades of white and pink that thrive in cool weather conditions. It makes a stunning statement in outdoor hanging baskets or window boxes.

    Airy coreopsis blooms during summer and autumn with yellow, pink, or bicolor flowers above finely-textured foliage. A native prairie plant, it serves as an attractant to wildlife.

    Amaranthus

    Late summer and fall perennial flowers often go unnoticed in gardens. Their brilliant hues can add beautiful touches of color, while adding diversity. Gardeners frequently include these perennials in their design plans; planting and caring for these perennials may even dovetail with other tasks associated with fall gardening such as leaf cleanup, winter garden preparations and bulb planting for spring blooms.

    Amaranthus, or amaranths, are easy perennial plants to grow that make a colorful addition to late season gardens. You can grow amaranth seeds quickly in either your garden or containers; their flower heads last well even in cut arrangements! Some varieties feature pompon tassels while others sport daisy-like florets.

    Coreopsis is an easy-care perennial that produces colorful flowerheads in warm hues of yellow, pink and red that attract pollinators. It makes an excellent addition to mixed borders or natural areas and pairs well with other fall-blooming perennials like Japanese anemone or obedient plant for added color and pollinators. Native to North America and found across much of its range – Coreopsis can also be grown alongside Japanese anemone and obedient plant for even greater beauty!

    Add long fall blooming season by including low maintenance perennial sedum as part of your garden design. An excellent groundcover, border or rockery plant, it thrives in full sun. Sedum ‘Sage Advice’ features long blue flower spikes which bloom from August onwards – ideal for edging or screening!

    Canna lily (Amaranthus hypochondriacus) creates an exotic look with its vibrant blooms and vibrant foliage. Easy to care for in most conditions – even poor ones – its leaves boast vitamins A & C, calcium, iron and other essential minerals for optimal health. Native peoples have used canna lily as both an edible grain crop and leafy vegetable for millennia!

    Coneflowers

    Coneflowers, scientifically known as Echinacea, are a vibrant and popular perennial plant that belongs to the Asteraceae family. Native to North America, these striking flowers are celebrated for their resilience, colorful blooms, and medicinal properties. The genus name “Echinacea” is derived from the Greek word “echinos,” meaning hedgehog, referring to the spiky central disk of the flower.

    One of the most distinctive features of coneflowers is their prominent cone-shaped disk in the center, surrounded by ray-like petals that can range in color from pink and purple to white. This cone, often referred to as the “seed head,” is not only visually appealing but also serves as a valuable food source for birds during the fall and winter months.

    Coneflowers are renowned for their adaptability and hardiness, thriving in a variety of soil types and weather conditions. They are a favorite among gardeners for their low-maintenance nature and ability to attract pollinators such as butterflies and bees. The plant’s resilience also makes it suitable for xeriscaping, as it can withstand drought conditions once established.

    Beyond their ornamental value, coneflowers have been traditionally used for their medicinal properties by Native American tribes. The roots and flowers contain compounds believed to boost the immune system and alleviate symptoms of colds and infections. In contemporary herbal medicine, Echinacea supplements are popular for their potential immune-boosting effects.

    Coneflowers have become a staple in gardens, not just for their aesthetic appeal but also for their role in supporting local ecosystems and providing a touch of natural beauty. Whether in a formal garden or a wildflower meadow, these resilient and colorful perennials continue to capture the admiration of garden enthusiasts and nature lovers alike.

    Trumpet Vine

    Trumpet Vine, scientifically known as Campsis radicans, is a vigorous and ornamental flowering plant that belongs to the Bignoniaceae family. Native to the southeastern United States, this deciduous woody vine is cherished for its stunning trumpet-shaped flowers and ability to thrive in various climates and soil conditions.

    The plant earns its common name from the distinct shape of its blossoms, which resemble trumpets or funnels. These vibrant flowers, which can be orange, red, or yellow, typically bloom in clusters during the summer months, attracting hummingbirds and bees with their nectar-rich centers. The trumpet vine’s ability to draw pollinators makes it a valuable addition to gardens seeking to support local biodiversity.

    Trumpet vines are known for their rapid growth and climbing abilities. They can reach impressive heights, making them ideal for covering fences, trellises, and arbors. The twining nature of their stems allows them to easily cling to vertical surfaces, creating a lush and green backdrop with the added bonus of spectacular floral displays.

    While their exuberant growth is an asset in landscaping, it’s essential to consider the plant’s tendency to spread. Trumpet vines can become invasive if not properly managed, sending out runners and producing numerous seed pods. Regular pruning is recommended to control its expansion and encourage a more compact and manageable form.

    Despite their robust nature, trumpet vines are relatively low-maintenance, thriving in full sunlight and adaptable to various soil types. Their resilience makes them suitable for a range of climates, from hot and arid regions to more temperate zones.

    Gardeners often appreciate the trumpet vine not only for its aesthetic qualities but also for its role in attracting beneficial wildlife. Its ability to transform outdoor spaces into vibrant, blooming havens underscores its popularity as a versatile and eye-catching addition to gardens and landscapes.

    Dahlias

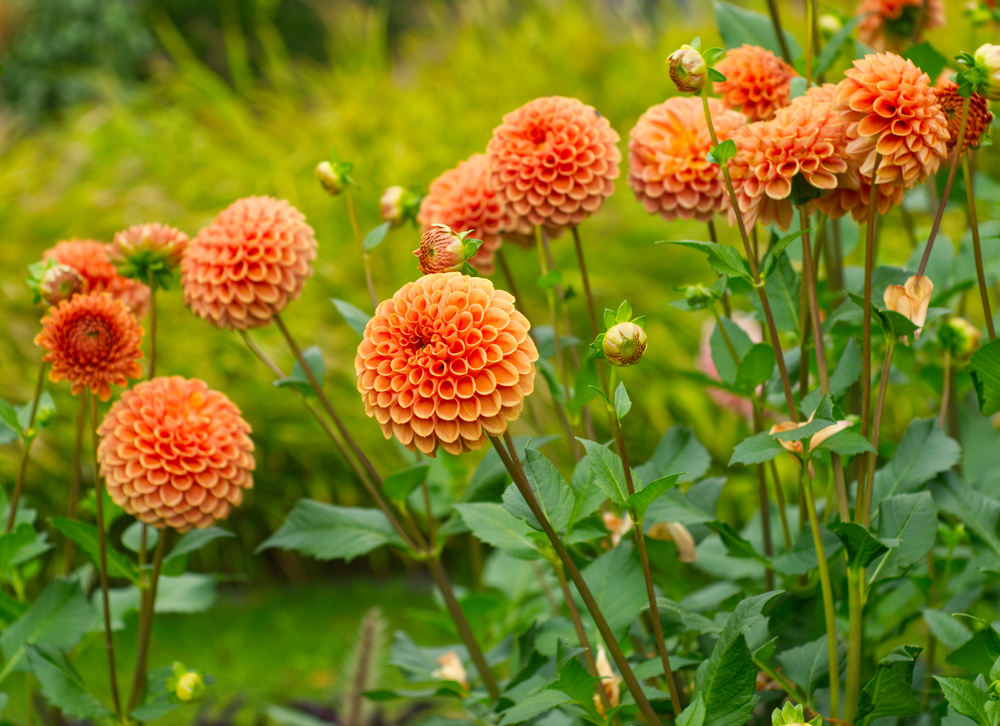
    Dahlias are perennials that make an eye-catching show in autumn gardens. From deep purple and lavender hues, to white and pink blooms that last right until frost comes, dahlias provide star-like blooms until frost arrives – they’re easy to grow, hardy in all climates and attract pollinators galore; ideal as borders or in containers!

    Asters offer fall garden color in many shades of blue and purple, are easy to grow, and are drought tolerant – perfect for beds or rockeries in full sun conditions. Additionally, their blooms serve as one of the final big food sources for bees and butterflies before winter sets in.

    Late summer and fall blooming perennials can add variety and interest to your garden, making it look better throughout the season. They also tie in perfectly with other fall garden tasks such as leaf cleanup, preparing the garden for winter storage and bulb planting for spring bloom.

    From early spring through fall, perennials provide your garden with color: Tulipa nigricans), Daffodils (Narcissus spp.) and Hyacinths (Hyacinthus orientalis). Perennial Chrysanthemums provide both vibrant foliage and colorful blooms – adding vibrant hues in early fall before providing attractive seed heads throughout winter!

    Sedum

    Fall is an excellent time to plant perennial flowers; many gardeners rush out in spring to do it but fall planting can also be just as effective. Planting early gives plants time to become established before winter arrives. Plus, garden centers usually increase stock in anticipation of fall planting season making it easy to find what you need! If deer or rabbits nibbling away at your new additions is a concern for you, choose an area away from their reach when planting new perennials.

    Sedums are easy to cultivate and make an attractive groundcover in any landscape, from low-growing clumps, spreading mats, and upright forms with flower buds that bloom throughout summer and fall to low-lying mats with flower buds that open regularly throughout their growing seasons. Their wide array of colors and leaf shapes complement any garden design perfectly while remaining deer and rabbit resistant!

    Many varieties of sedums are better-known for their foliage than for their blooms, yet some varieties also boast beautiful flowers. ‘John Creech’ features finely-textured green and yellow leaves arranged into dense mounds while ‘Elizabeth’ spreads across rich green foliage with tiny pink blooms above it; Autumn Joy and Dragon’s Blood have rose-pink flowers perched atop burgundy leaves to complete this picture.

    Taller sedums like ‘Pride and Joy’ boast a tidy mounded habit with green-gray foliage that’s punctuated by pink blooms in late summer. Lemonjade stands out with bright citron-yellow blooms instead of its usual pink, making it an excellent choice for borders, rock gardens or beds.

    Many cool weather annuals such as pansies (Viola cornuta), foxglove (Veronica x Grosso’) and violas (Viola), produce blooms that remain attractively colorful throughout fall and even into winter in some climates. Their appeal increases significantly when combined with other autumn bloomers.

  • How to Clean Concrete With Muriatic Acid

    How to Clean Concrete With Muriatic Acid

    Concrete surfaces can become stained with various types of stains that obscure their beauty and the overall aesthetic of your home or business. While basic pH chemicals can often remove mold and moss stains, stronger cleaners such as muriatic acid should be employed for tougher rust, oil and mineral stains.

    Muriatic acid can be an effective means of cleaning filthy concrete surfaces, but should only be employed as a last resort when other cleaning methods fail. Before resorting to muriatic acid-based cleaners for any concrete cleanup projects, seek professional guidance before considering using muriatic acid concrete on its own.

    Wear Safety Goggles and Gloves

    Concrete is an increasingly popular building material, yet cleaning it can be challenging. There is no universal concrete cleaner; rather, you must tailor your approach depending on the type of stain being removed. However, with proper tools and knowledge at your disposal you can achieve an impeccable clean concrete surface finish that meets all your expectations.

    At first, concrete must be agitated using either a broom or power sweeper in order to loosen any dirt and debris on its surface. Next, use a brush with soapy water or an acid cleaner like muriatic acid or trisodium phosphate (TSP) but be aware of potential dangers; such cleaners are highly toxic and should be handled carefully with protective eyewear and gloves in order to be successful.

    Momentary exposure to dry concrete dust should not cause harm, but coming into contact with damaged skin could irritate and potentially lead to chemical burns. Protective gloves and long sleeves are recommended to limit skin contact with concrete dust as well as using a face mask or respirator when working with it.

    Many cleaners contain acid or alkaline elements that can damage concrete surfaces if not used in accordance with their proper ratios and safety precautions. Acid-based cleaners in particular can even cause permanent etching damage over time if left too long on surfaces; to protect yourself, always follow all instructions exactly.

    There are also a range of eco-friendly concrete cleaners that are capable of effectively eliminating specific types of stains on concrete surfaces, such as pet urine stains. Enzymatic cleaners specifically made for pet urine removal can successfully break down and dissolve protein deposits on surfaces to stop any future reappearance of urine spots on them.

    Before moving on to more intensive concrete cleaning methods like etching or sand blasting, such as etching or sand blasting, it is imperative that the concrete be fully cured and dry (at least 28 days after curing). Also it may be wise to have someone help scrub while another rinses and dries it off afterwards.

    Keep the Area Wet

    Concrete is one of the strongest construction materials available, but it can also be one of the hardest-wearing surfaces when it comes to stain removal. Luckily, powerful chemicals like muriatic acid can remove even stubborn stains – just remember that it must be handled carefully as its high corrosion risk requires special precaution.

    Before using hydrochloric acid, it is wise to begin on a clean surface and wet the area first – this will help avoid burning and damaging any other surfaces which come into contact with it. A garden hose or sprayer may help, as fumes of hydrochloric acid can rise upwards.

    Before beginning this project, it is vital that you wear personal protective equipment like safety goggles and gloves. Make sure that any plants or objects which could be affected by acid are far enough away and that there is enough space available. Once the surface has been sufficiently cleaned up, be sure to rinse several times with water to neutralize acidic residue from drying up, thus avoiding powdery deposits from forming later on.

    Not only will this process protect yourself and reduce waste production, it’ll also help reduce waste volume. Make sure to thoroughly rinse any areas exposed to hydrochloric acid before disposing of its solution appropriately – for maximum environmental impact prevention it should preferably go down a drain rather than into gutters.

    While this method may require more time and effort than some of the other solutions we have shared, it can be extremely effective at eliminating stubborn stains from concrete surfaces. In particular, it works great at getting rid of rust stains, oil stains, algae stains and paint splatters from surfaces. By following the steps outlined herein you should be able to achieve an extremely clean and polished concrete surface using this approach.

    Dilute the Acid

    Muriatic acid, also known as hydrochloric acid, is a strong chemical capable of damaging surfaces if misused incorrectly. Before applying it to concrete surfaces, however, it must first be diluted to lessen its toxicity and make cleaning more effective – this requires some safety precautions but shouldn’t prove too challenging if followed as directed.

    Begin by donning personal protective equipment, such as goggles and rubber gloves. Before working with acid, ensure the area is adequately ventilated. Fill a bucket with water and slowly add muriatic acid into it until its liquid state has completely dissipated; avoid adding too much at once as this could trigger an explosive chemical reaction!

    Once you have an appropriate solution in hand, cleaning concrete becomes simple. Apply acid with either a brush or sprayer depending on your preference; just remember to rinse afterward and use ammonia or white vinegar neutralizers as needed to restore pH balance and ensure lasting success.

    Muriatic acid can also be used to quickly remove paint splatter from concrete surfaces. It works especially well if the paint has been sitting there for some time; for larger amounts of paint removal you may wish to combine this technique with pressure washer use.

    Once your task is complete, rinse the concrete surface with cold water to avoid further damage and seal it again using a penetrating sealer or masonry primer to help prevent future stains from developing.

    As muriatic acid cannot effectively remove oil or grease stains from concrete, an enzymatic cleaner designed for this task should be utilized instead. Furthermore, acid should not be applied on sealer applied with polyurethane finish as this could potentially damage it and create havoc with any future treatments; test a small area with the acid before beginning an extensive clean.

    Apply the Acid

    Markets are full of sprays, powders, and liquid cleansers designed to clean concrete surfaces efficiently and quickly. Most work effectively when followed closely; for particularly stubborn stains on concrete however, something stronger such as muriatic acid or trisodium phosphate (TSP) might be necessary – these stronger chemicals require greater concentration and skill when cleaning than their counterparts do.

    Start by donning protective equipment like safety goggles, long rubber gloves and a mask. Before beginning cleaning any area, hose it down first so that the area remains wet. Also wet nearby plants and soil to prevent acid damage caused by any acids released into the atmosphere.

    Create muriatic acid solutions by slowly adding chemical components to water in a bucket. Use only plastic buckets and wooden stir rods when stirring, never metal! Be mindful not to mix acids together because this acid can burn skin, eyes and other body parts severely; always follow manufacturer recommendations when diluting.

    Once your solution is ready, use a brush to apply it directly onto the concrete surface. You will know it is working when bubbles appear as it reacts with acid in the solution. If etching depth is insufficient for you, apply more solution and continue scrubbing until desired effect has been reached.

    Once your scrubbng is complete, rinse the concrete thoroughly to neutralize its acid wash and bring its pH level down towards 7.0 for optimal results. Failing to do this could cause irreparable damage to the cement structure.

    After you have rinsed, it’s wise to apply a masonry sealer. This will protect the concrete surface against future stains and keep it looking new and clean. Please follow manufacturer’s instructions when applying sealers; if previously sealed with penetrating acrylic sealers such as sealers containing acids could compromise this protective barrier and compromise future sealing efforts.

  • Little Cottage Company Colonial Gable Greenhouse: A Must-Have for Every Gardener

    Little Cottage Company Colonial Gable Greenhouse: A Must-Have for Every Gardener

    Gardening is a passion that has been passed down from generation to generation. It not only allows you to grow your own food, but it also gives a sense of fulfillment and relaxation. However, for most gardeners, their biggest challenge is finding the perfect greenhouse to protect their plants from harsh weather conditions. This is where the little cottage company colonial gable greenhouse comes in. As a reputable manufacturer of high-quality greenhouses, this company has taken gardening to the next level with its Colonial Gable Greenhouse.

    The History behind Little Cottage Company

    To truly appreciate the Colonial Gable Greenhouse, we must first understand the history and values behind the Little Cottage Company. This family-owned business was established in 1999 and has since become a household name among gardeners. Their focus on quality, customer satisfaction, and environmental sustainability has earned them a loyal customer base.

    But it’s not just about their principles – the company is also known for its exceptional craftsmanship and attention to detail. Each greenhouse is made by skilled Amish craftsmen, ensuring that every piece is of the highest quality.

    The Colonial Gable Greenhouse: A Marvel of Design and Functionality

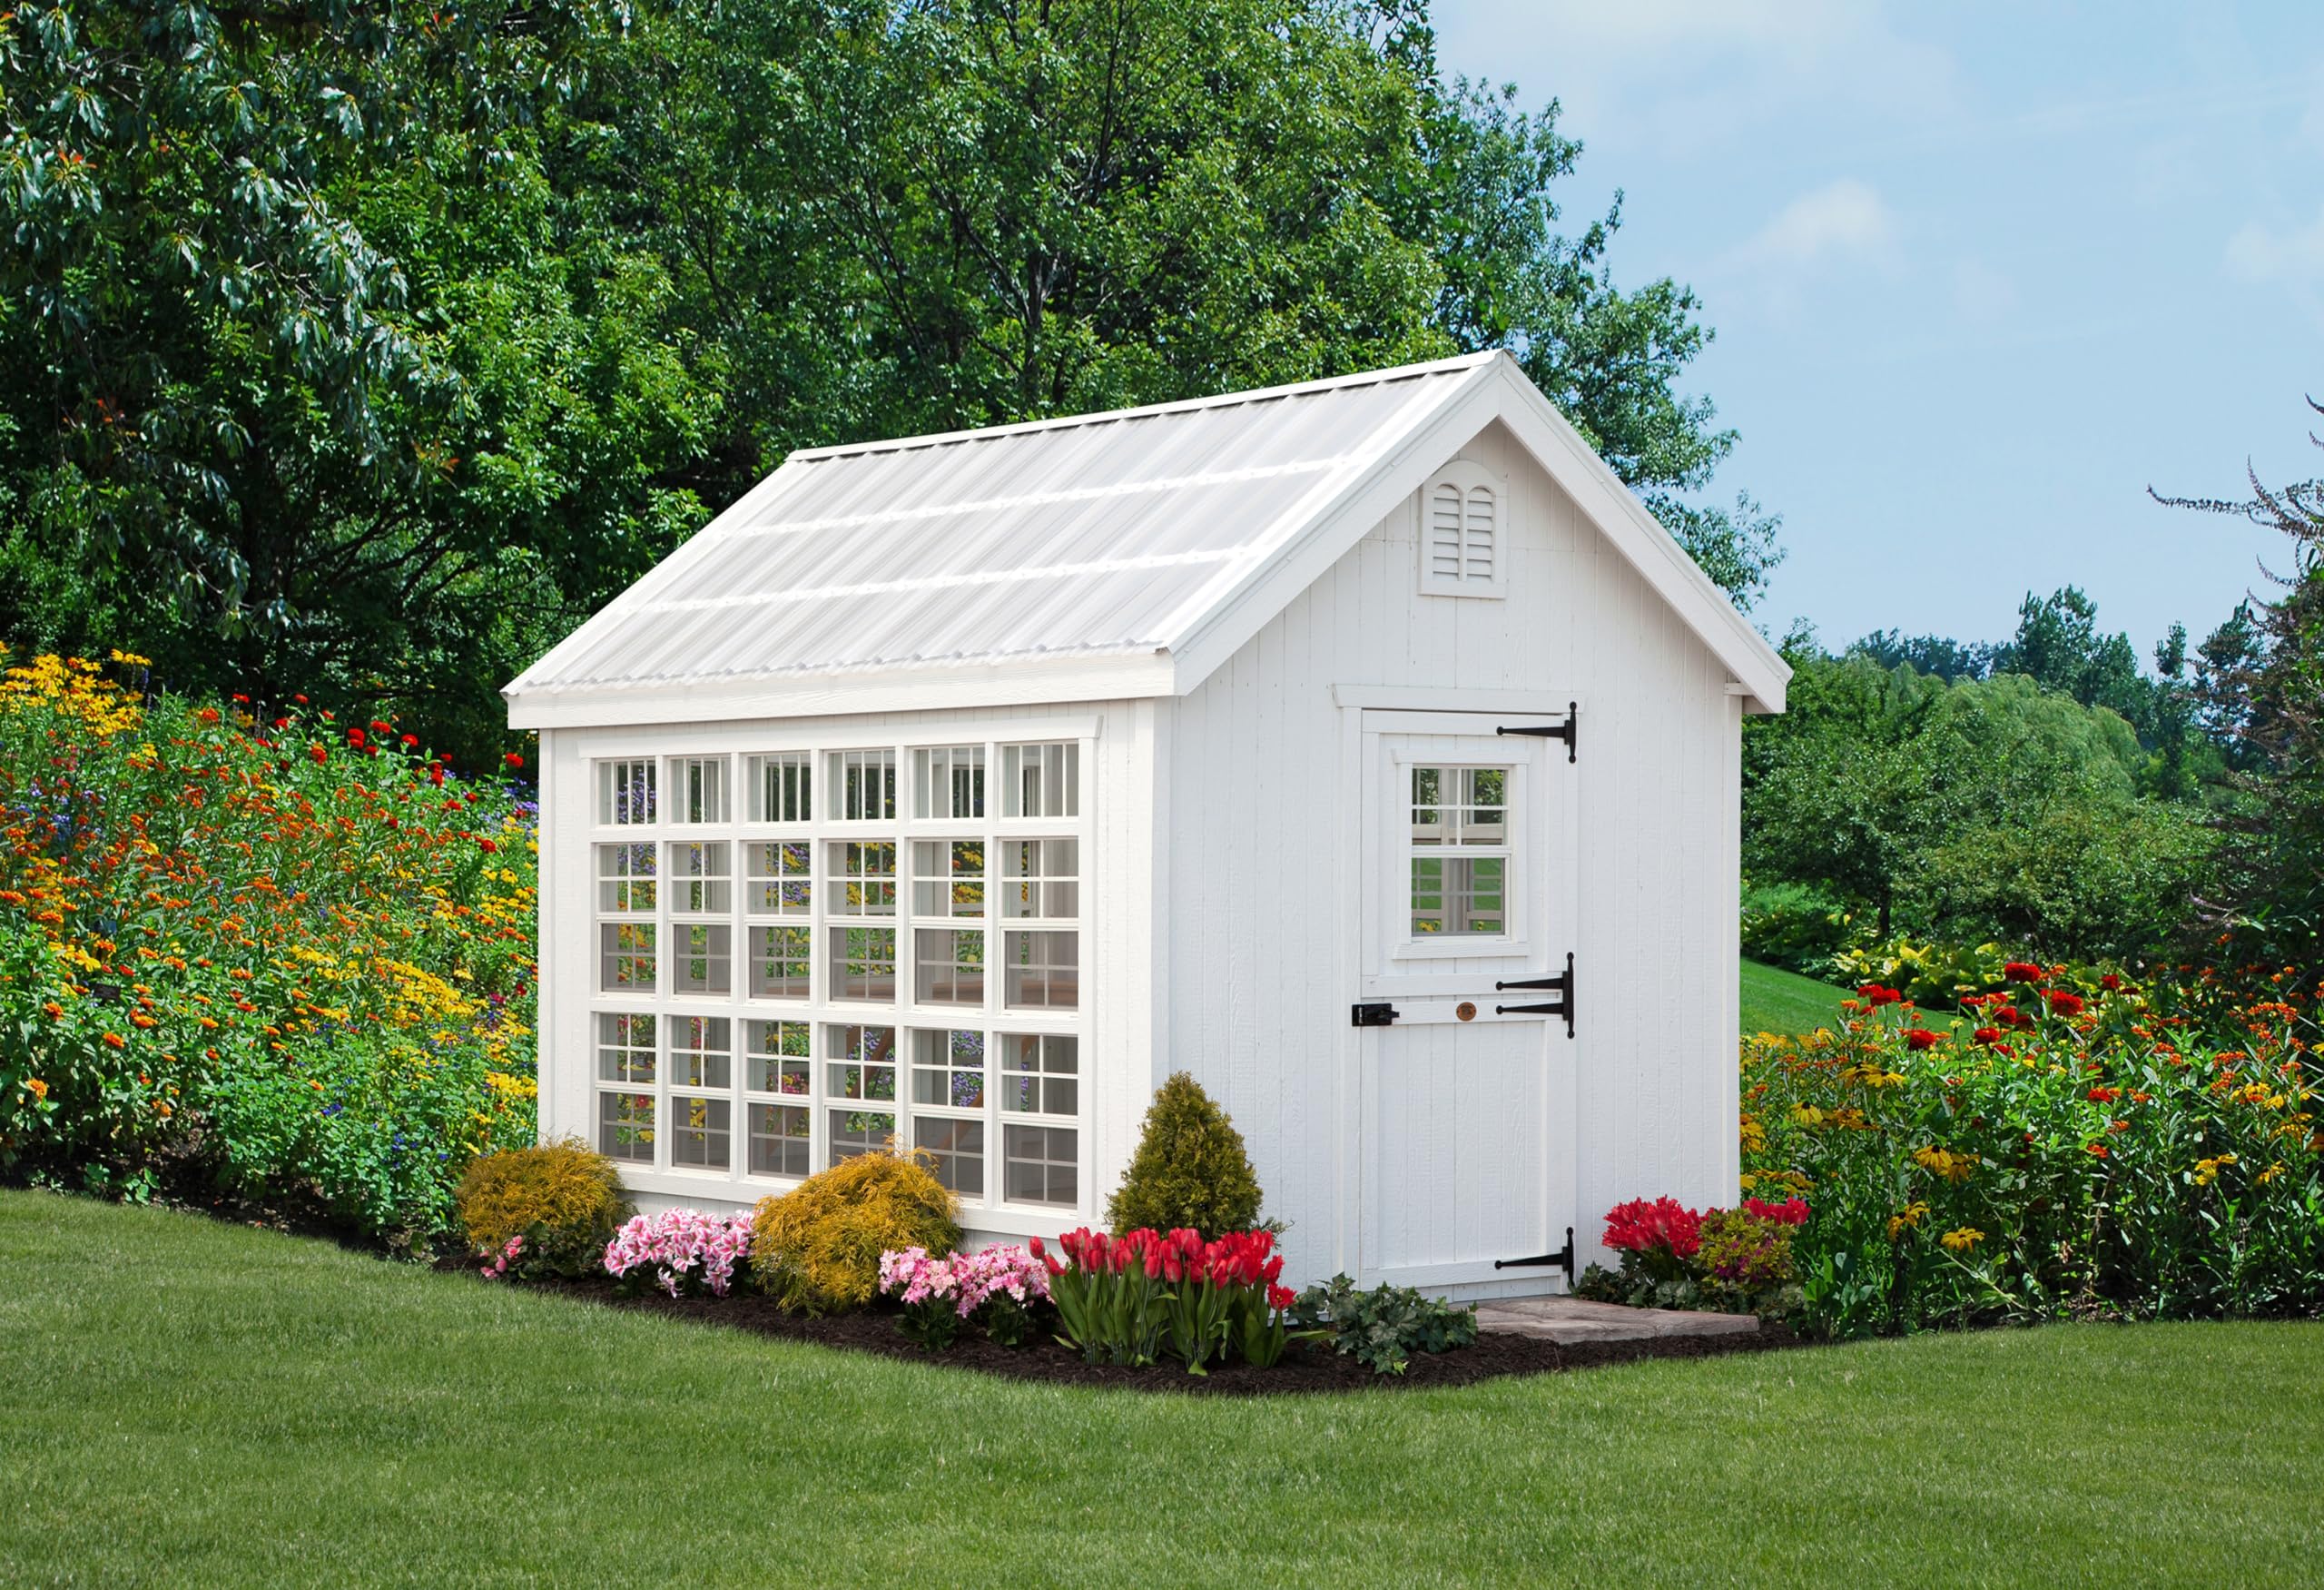
    So, what makes the Colonial Gable Greenhouse stand out among other models in the market? First and foremost, its design is a perfect blend of colonial charm and modern technology. It comes with a classic white trim and a black aluminum frame, giving it a timeless and elegant look. The roof design is also unique, with steeply pitched gables that allow for better ventilation and natural light.

    But the beauty of this greenhouse goes beyond its exterior. Its panelized kit design makes it easy to assemble without any professional help. All you need are basic tools and some handyman skills, and you’ll have your greenhouse ready in no time. This saves you the cost of hiring a contractor and also ensures that you have a personal connection with your greenhouse.

    Unmatched Quality and Durability

    When investing in a greenhouse, it’s important to consider its quality and durability. After all, this is where you’ll be growing your precious plants, so it needs to withstand various weather conditions and last for years to come. With the Colonial Gable Greenhouse, you can rest assured that you’re getting a top-quality product.

    The greenhouse is made with high-grade polycarbonate panels that are UV treated and virtually unbreakable. The aluminum frame is also rust-resistant, ensuring that your greenhouse remains in excellent condition even after years of use. Plus, each panel is designed with a unique snap-in system, making it easy to replace any damaged panels.

    Options for Every Gardener

    The Little Cottage Company understands that every gardener has different needs and preferences. That’s why the Colonial Gable Greenhouse comes in multiple sizes ranging from 8’x8′ to 14’x24′. This allows you to choose the perfect size for your space and gardening needs.

    Additionally, the company offers customization options such as adding a potting bench or shelving to maximize space and functionality. They also offer upgrades like an automatic vent opener and greenhouse heaters, making it possible to use your greenhouse all year round.

    Environmentally Friendly Option

    For many gardeners, environmental sustainability is an important factor when choosing a greenhouse. The Little Cottage Company takes this into consideration by using sustainable materials and practices in their manufacturing process. The polycarbonate panels used for the Colonial Gable Greenhouse are 100% recyclable, while the excess wood from production is repurposed or donated to organizations that promote reforestation.

    Conclusion

    In conclusion, the Little Cottage Company Colonial Gable Greenhouse is a must-have for every gardener. Its unique design, high-quality materials, and customization options make it a superior choice in the market. Plus, with its focus on sustainability and customer satisfaction, you can feel good about your investment in this greenhouse. So why wait? Get your own Colonial Gable Greenhouse today and take your gardening experience to the next level. So, if you’re looking for a greenhouse that not only protects your plants but also adds beauty and functionality to your garden, look no further than the Little Cottage Company Colonial Gable Greenhouse. With its rich history, quality craftsmanship, and environmentally friendly practices, it is truly a gem among greenhouses. Don’t miss out on the opportunity to own one for yourself and enjoy the benefits of gardening all year round. So go ahead, get your hands on a Little Cottage Company Colonial Gable Greenhouse today and take your gardening experience to the next level! Happy gardening!

    References

    • https://www.littlecottageco.com/about-us/
    • https://www.littlecottageco.com/Greenhouses/Colonial-Gable
    • https://www.littlecottageco.com/product-category/greenhouses/colonial-gable/
    • https://www.littlecottageco.com/faqs/
    • https://www.greenhousestores.co.uk/blog/post/a-review-of-the-little-cottage-company-colonial-gable-greenhouse-by-emily-hilton/
    • https://www.greenhousereviewsite.com/little-cottage-company-colonial-gable-greenhouse-review/ The History behind Little Cottage Company

    To truly appreciate the Colonial Gable Greenhouse, we must first understand the history and values behind the Little Cottage Company. This family-owned business was established in 1999 and has since become a household name among gardeners. Their focus on quality, customer satisfaction, and environmental sustainability has earned them a loyal customer base.

    Quality Craftsmanship by Skilled Amish Craftsmen

    At the Little Cottage Company, every greenhouse is hand-crafted with precision and care. The company takes pride in their skilled team of Amish craftsmen who use traditional techniques to create each greenhouse. This not only ensures that every piece is of the highest quality but also supports their commitment to preserving traditional crafts and techniques.

    A Company with Values

    Aside from their exceptional craftsmanship, Little Cottage Company stands out for its values and principles. They believe in providing value to their customers through top-quality products and excellent customer service. They also prioritize environmental sustainability and giving back to the community, reflecting a deep-rooted sense of responsibility towards the environment and society.

    Colonial Gable Greenhouse: A Classic Design

    The Colonial Gable Greenhouse is a testament to the company’s values and commitment to quality. Its classic design, reminiscent of traditional colonial architecture, adds charm and character to any garden or backyard. The white trim and black aluminum frame give it a timeless look that will never go out of style.

    Easy to Assemble Panelized Kit

    One of the unique features of the Colonial Gable Greenhouse is that it comes in a panelized kit. This means that all parts and panels are pre-cut, making assembly a breeze. With the help of a friend, you can have your greenhouse ready in no time. This saves you the hassle and expense of hiring a professional for assembly.

    Durability and Longevity

    The last thing any gardener wants is a greenhouse that falls apart after a few years. The Little Cottage Company understands the importance of protectin your precious plants, so it needs to withstand various weather conditions and last for years to come. With the Colonial Gable Greenhouse, you can rest assured that you’re getting a top-quality product that will stand the test of time.

    The greenhouse is built with high-quality materials such as UV-resistant, twin-wall polycarbonate panels and heavy-duty aluminum frames. This ensures that your plants are protected from harsh sunlight and extreme weather conditions while also maintaining its structural integrity.

    Moreover, the Colonial Gable Greenhouse comes with a 5-year warranty, giving you peace of mind and confidence in your investment.

    Versatile Design and Customization Options

    Whether you’re a seasoned gardener with specific needs or just starting, the Colonial Gable Greenhouse offers versatility and customization options to suit your preferences. The base greenhouse comes with double doors for easy access and an optional rear wall panel to attach it to an existing structure. You can also add additional accessories such as shelves, benches, and automatic roof vents to enhance the functionality of your greenhouse.

    Sustainability at its Core

    Sustainability is a crucial aspect in today’s world, and Little Cottage Company recognizes this. The little cottage company colonial gable greenhouse panelized kit is designed with eco-friendliness in mind. The polycarbonate panels used are recyclable, and the wood is sourced from sustainable forests. This not only minimizes your environmental footprint but also supports responsible forestry practices.

    Customer Satisfaction Guaranteed

    Little Cottage Company prides itself on its excellent customer service and satisfaction. They understand that investing in a greenhouse is a significant decision, and they strive to make sure their customers are happy with their purchase. Their team of dedicated professionals is always ready to assist and answer any questions or concerns you may have.

  • How to Revive a Prayer Plant

    How to Revive a Prayer Plant

    Prayer plants require proper care to remain lush green houseplants. Keep the soil moist in Summer while partially drying it out during Winter.

    Locating what is causing the plant to suffer is key in revitalizing it. It could be anything from low humidity levels to an inadequate watering schedule.

    Watering

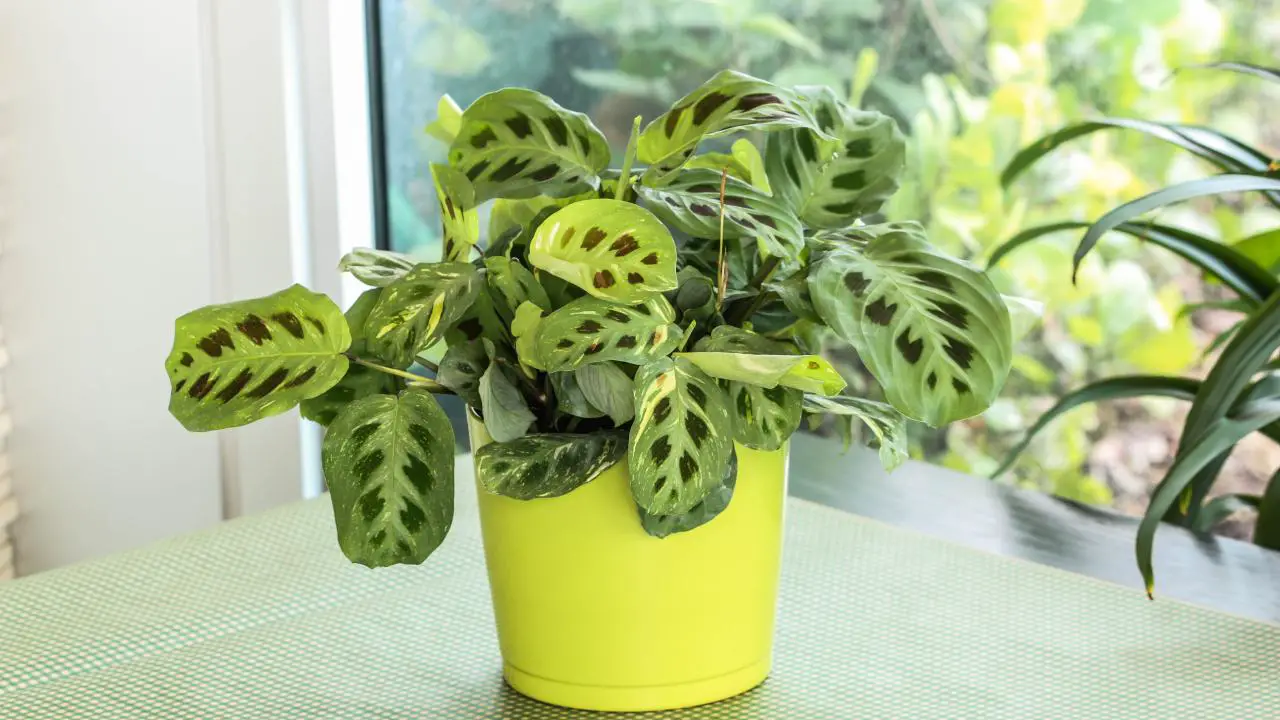
    The prayer plant is a popular indoor gardening choice. This houseplant features stunning leaves with silvery splotches on a dark background that creates an eye-catching design. While these houseplants may seem easy to care for, their care needs need to be addressed if they want it to survive long term. If neglected for too long or mistreated improperly they could die quickly!

    As soon as your prayer plant begins to droop or hang limply from its stems, that’s often an indicator of lack of water. To save this precious plant from dying out completely, ensure its soil remains moist but not saturated; you can test this level by inserting your finger into the top inch of soil; if dryness occurs quickly then more water may be necessary; but be wary about leaving too much moisture for too long as that could cause root rot to set in.

    An ideal soil for healthy prayer plants consists of rich, well-draining soil that is slightly acidic. To create this ideal environment, mix equal parts of peat moss, vermiculite and perlite together in equal portions before adding slow release fertilizer for maximum growth potential. Also check drainage holes regularly as these can become blocked over time due to compacted soil build-up.

    Low humidity is often the reason behind prayer plants’ decline and wilt. You can quickly increase moisture in the environment around them by placing them near a humidifier or pebble tray. Just make sure never to spray water directly onto their leaves as doing so could cause fungal infections as well as attract pests!

    If your prayer plant is experiencing more serious health issues, you may need to uproot and repot it with fresh soil in order to provide it with all of the vital nutrients it requires for good health and vitality. After repotting it in fresh soil, make sure that you water thoroughly after each repotting to ensure the soil doesn’t dry out too quickly; additionally monitor for signs of disease like yellowed or brown leaves on its leaves.

    Light

    If your prayer plant has fallen on hard times, there are steps you can take to revive it. First step should be identifying what has caused its demise – overwatering, lack of light, pest infestation or something else altogether could all contribute to its decline. Once identified, take appropriate actions and watch as your plant flourish again!

    As soon as your prayer plant begins to show signs of overwatering, take immediate steps to assess its soil. Overwatering can cause root rot and damage – to avoid this make sure the soil is completely dry before adding any extra moisture with watering cans or by using a soil probe which provides accurate readings of moisture levels in soil and alerts you when its time to water again.

    One issue many people experience with prayer plants is insufficient lighting, leading to leaf loss and slow growth. To combat this issue, try providing more indirect bright light or moving your plant somewhere brighter; marantas, calatheas and ctenanthes tend to flourish in indirect bright lighting – this mimics their native rainforest environment and they prefer indirect sun such as what can be found there; therefore they make excellent houseplants for sunny windowsills.

    However, too much direct sunlight may cause its leaves to turn yellow or even burn as prayer plants cannot tolerate extended exposure to direct sun. To save your plant from this fate, move it to an area with lower light intensity while still receiving some sun.

    Last, it is essential to monitor the temperature of your plant. Prayer plants thrive in warm environments such as kitchens or bathrooms where humidity levels can remain high – thus ideal conditions exist for them.

    Once again, it’s essential that any dead leaves on your prayer plant be promptly removed in order to halt disease or insect infestation that could potentially threaten its survival and kill off its leaves altogether.

    Humidity

    Prayer plants are tropical in origin and thrive best under humid conditions; therefore it is important to create the same conditions at home. Too little humidity can lead to root rot in prayer plants. To restore their health and restore them to health quickly, increase humidity levels in their environment while providing plenty of light.

    Overwatering prayer plants is one of the primary issues they experience, as this will cause damage to their roots. If your plant appears drooping or wilted, check for waterlogged clumps in its soil that need removing to help rehydrate properly – this should enable the plant to begin looking better quickly!

    Be mindful of how much water you’re giving the plant. Your plant will tell you if it needs more by drying out; but, if this becomes severe, the drought could kill it completely. To avoid this situation, water the soil regularly enough so it remains moist but not saturated or boggy; consider investing in a moisture probe that allows you to test its moisture levels prior to watering it.

    Pest infestation is another serious threat to prayer plants. They’re especially prone to spider mites and aphids, both of which can quickly lead to their demise and should be kept at bay with horticultural neem oil spray – this will kill off any pests while simultaneously stopping their spread to other plants.

    Be sure to provide regular feedings of houseplant fertilizer to the prayer plant, which requires many nutrients for healthy growth and revival. Apply this particular Marantaceae safe fertiliser once every other week throughout the year for best results; just remember it’s quite fragile so take precautions if needing to move it around. With these simple steps, your prayer plant could quickly return from dormancy!

    Temperature

    Prayer plants are tropical plants that flourish under high humidity conditions. When exposed to dry air or soil that does not drain well enough, prayer plants may suffer irreparable damage and even die; with the right care however, these prayers can often be restored back to health again.

    Marantaceae plants such as prayer plants require moist but not waterlogged soil for optimal health, due to their sensitive roots that become waterlogged if there is too much humidity. Indoor growers should ensure the soil can drain quickly so as to prevent root rot that often leads to prayer plant wilt.

    Avoid this issue by selecting a light, loose soil mixture. This will allow roots to drain freely while keeping moisture levels constant – an ideal mix would include 40% peat moss, 40% perlite, 20% orchid bark and 10% potting soil.

    Use of an appropriate soil mixture can also decrease the risk of overwatering, which is important when raising prayer plants. Too much water can cause root rot that kills prayer plants. Furthermore, overwatering may result in fungal infections damaging leaves and stems of your plant resulting in dull and lifeless appearance.

    Another likely reason for prayer plant wilting is being placed directly in sunlight. Since they’re native to rainforests, prayer plants (and other Marantaceae) prefer indirect lighting over bright direct illumination. If it is currently near a window that provides direct light exposure, relocate it for optimal results.

    Wilting prayer plants could also be suffering from pest infestation. Mealybugs, aphids, and spider mites can be responsible for this situation; regular inspection of plants for signs of these insects should help. Furthermore, maintaining optimal humidity levels will help deter their return.

    Wilting prayer plants could also be experiencing salt or chemical buildup in their soil, which may occur if it has been overfertilized, or is in an old pot without adequate drainage facilities. In such an instance, it would be wise to repot them with new soil mixture and an updated pot with better drainage facilities.

  • How to Keep Garlic Longer

    How to Keep Garlic Longer

    No matter whether it is grown from seeds in your own garden or purchased at the grocery store, garlic can remain edible for months in ideal conditions. But once it has been cut open into cloves, its shelf life drastically diminishes.

    To ensure maximum freshness of garlic bulbs, store it somewhere cool, dark, and dry – such as the refrigerator – even though this often results in sprouting. However, peeled and sliced garlic works just as effectively in this regard.

    Temperature

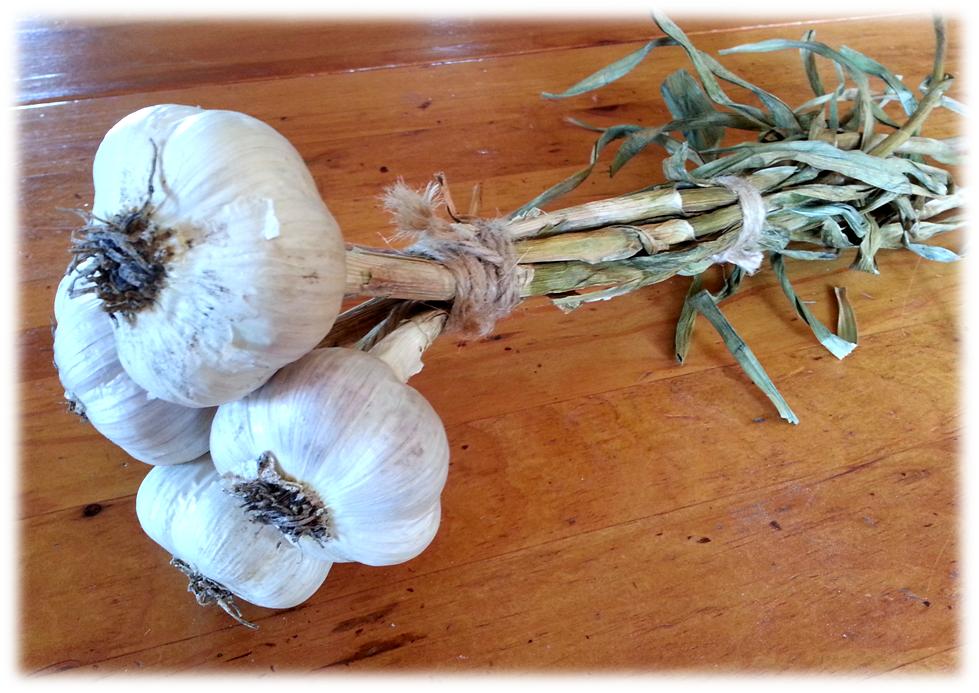
    Store whole bulbs of garlic in a cool, dark area away from light to ensure that its crisp texture and flavor remain preserved. A pantry shelf or spare cupboard are both suitable storage solutions – aim for temperatures between 60-65 degrees Fahrenheit for optimal conditions for garlic storage.

    Cooler temperatures ensure that cloves won’t sprout or rot prematurely, which is important since once your garlic begins to spoil, its shelf life decreases significantly. Furthermore, it is advised to store garlic away from foods with strong odors like onions and fruit so as to prevent their aromas from transferring onto it and spoiling its quality.

    Before storing garlic, be sure that it has been adequately cured – this process may take as little as two weeks in warmer, dry climates and up to two months for rainy, humid regions. Curing reduces moisture in the bulb while simultaneously intensifying flavor – both factors will extend its shelf life.

    For optimal results, store whole bulbs of garlic in a cool, dry environment until they’re time to be used. Unpeeled cloves should be stored in the refrigerator since their life won’t be extended at room temperature.

    Garlic is sensitive to cold temperatures, so when stored in the freezer you’ll want to make sure it doesn’t become hard and tough or lose its flavor. Storing it in the fridge or using it immediately may prevent this problem.

    If you decide to store your garlic in oil, it’s essential that the container be sterilized prior to adding any garlic. This will reduce bacterial growth risk that could spoil it and result in food poisoning. Once added, monitor it regularly for signs of spoilage such as foul odors or discoloration as this could indicate spoilage and require monitoring accordingly.

    Humidity

    Garlic exposed to moisture can quickly lose its potency, especially whole bulbs and unpeeled cloves that have yet to be peeled. A humid environment leads to mold growth which rots the garlic over time – thus, it’s crucial that its storage occurs in an area with proper air circulation for optimal storage conditions.

    Refrigeration can actually cause garlic to spoil over time; for best results, store whole, unpeeled cloves at cool room temperatures instead. Many believe that refrigerators provide adequate storage conditions, but this is actually not ideal as refrigeration could speed its degradation.

    If you’re storing unpeeled garlic, the ideal temperatures and relative humidity levels should fall between 60-68deg F and 50% respectively, to prevent sprouting while providing enough air circulation so it doesn’t become damp and moldy.

    Keep your garlic healthy by placing it in a mesh bag or basket that allows for sufficient ventilation, providing sufficient ventilation without becoming damp and spoilt. A perforated plastic container designed specifically for garlic storage will also help maintain an appropriate humidity level and ensure it receives enough airflow to remain healthy.

    Refrigerating is your best bet for keeping peeled garlic fresh and safe, though be wary that any signs of mold or off odors indicate spoilage quickly. Once detected, remove it immediately from your fridge.

    Refrigerating garlic stored in oil is also an excellent way to slow bacterial growth and extend its shelf life. Regular inspection of stored garlic for any signs of spoilage – soft spots or smells could indicate that its time has come; in such instances it would be wise to discard it all immediately.

    Light

    Garlic must be stored in a cool and dark area to preserve flavor and texture of cloves, so direct light should be avoided at all costs. Too much light can cause premature sprouting of hardneck varieties which tend to sprout more than softneck varieties.

    Store whole heads of garlic in a cool, dark environment that is safe from heat sources such as stoves or burners and close to the floor. Avoid keeping it in a refrigerator as exposure to moisture could damage it further; opt for a cabinet or pantry instead for optimal conditions for your garlic.

    If you have a lot of garlic on hand that you want to extend its shelf life, freezing could be the solution. Freezing works similar to dehydrating but with far fewer steps and greater long-term advantages. Whole heads, cloves or slices can all be frozen. When labeling storage containers with dates as garlic will deteriorate over time.

    Storing garlic properly is key to maintaining its flavor, texture and health benefits. Harvesting and curing are also critical in prolonging its shelf life; excessive water usage prior to harvesting could reduce overall quality and storability of your crop.

    When purchasing garlic at the supermarket, always opt for high quality bulbs with firm skins, tight pores and no evidence of mold or rot. Blemished garlic could indicate early harvesting which could shorten its shelf life significantly.

    Garlic is an invaluable food, offering numerous health benefits that range from helping reduce blood pressure, improve cholesterol levels, prevent high blood sugar, fight the common cold/flu virus by clearing away toxins. To prolong its shelf life and use for optimal results, it should be stored using one of the above techniques for preservation – leaving it stored in your fridge will only make it quickly spoil.

    Airflow

    Garlic is highly air sensitive, and must be stored in an environment with ample ventilation in order to prevent moisture accumulation that could lead to spoilage. Avoid airtight containers like plastic bags as these trap moisture inside and limit garlic shelf life; instead opt for airy storage solutions like wire baskets or racks which promote proper airflow to maintain low levels of humidity.

    Garlic can also be stored in a cool dark environment without risk of spoilage; however, to maximize shelf life it should be stored away from heat sources like stoves and ovens as these accelerate spoilage processes. A cool pantry or cabinet are good solutions for long-term storage.

    When selecting garlic for storage, look for firm bulbs with tight skins that do not contain soft spots or sprouting. Inspect for signs of mold or rot and promptly discard any that show them; this will preserve quality while also limiting waste.

    Vacuum sealing garlic can be an effective way to extend its shelf life and preserve its flavor for extended storage periods. Begin by placing garlic cloves in a resealable plastic bag with part open so air can escape during vacuum sealing process, then place this bag into a vacuum sealer machine as per manufacturer instructions and follow through until sealing process completes. Afterward, label and store in cool, dry place away from fruits and vegetables that release ethylene gas as this may hasten its ripening process and cause the garlic’s spoilage!

  • How to Fix Clay Soil

    How to Fix Clay Soil

    Heavy clay soils can be difficult and time-consuming to work, with numerous clods that clog tillers. Furthermore, they hold onto water and nutrients too tightly.

    Amending soil requires time and patience; however, there are ways to make the task much simpler and faster. To start off the process quickly and easily, loosen the soil by using a tiller set on its lowest setting to loosen it up.

    Add organic matter

    If your soil contains clay, adding organic matter will help loosen and improve its texture while helping the soil retain water and nutrients more easily. Organic matter comes in various forms including compost, well-rotted manure, leaf mold and even hay that can be purchased from garden centers or nurseries; however, making your own compost will lower costs while improving soil quality significantly.

    Amending clay soil creates more flexible and easy-to-work-with terrain, holding on to more water and nutrients that are beneficial for plants. However, please keep in mind that amending will take some time before it completely alters its structure.

    Soil consists of three key components: clay, silt and sand. Clay can be an invaluable addition to gardening soil because it holds in moisture very effectively; however, an excess of clay could prove problematic as its dense composition prevents free airflow or drainage. Clumping occurs frequently as water or air movement passes over this barrier of clay-covered earth.

    Organic material is one of the best ways to break up clay soil, whether added as a top dressing or mixed into it. You can buy prepackaged mixes or create them yourself using bark, sawdust, peat moss and composting materials. When selecting your mix it should contain high organic material content but low amounts of lime.

    Composting systems are another effective means of improving clay soil. Aeration holes provide an ideal opening for organic matter to enter the soil through.

    Organic matter attracts beneficial insects such as earthworms and microorganisms that help break up clay particles further. Reapplying organic material each year prevents its return; simply sprinkle some over the surface every fall or incorporate it during planting season to do just that.

    Add gypsum

    Clay soil is fertile, supporting many different plants – from roses to vegetables – but gardeners often struggle with its compact and sticky structure. There are a few ways to improve clay soil, including adding organic matter or gypsum; organic material like compost, leaf mold and manure helps aerate and loosen up compacted clay particles while attracing microorganisms that aid in breaking them down further. Gypsum adds calcium sulfate to improve clay soil; however it should be used carefully as this method adds calcium sulfate increases soil calcium concentration by up to an estimated 50%!

    Gypsum works by altering the chemical makeup of clay soil, dissolving its tiny granules and freeing up water to flow more freely – this allows plant roots to reach nutrients more easily while improving drainage by making soil less dense and clumpy. Gypsum can either be applied directly as powder or mixed into it through regular watering sessions.

    An optimal time and place for amending clay soil is directly after aeration, as this allows the amendments to better sink in and work their magic. Also, avoid walking on recently amended soil – doing so can compact it further, worsening problems further still.

    One of the more frequently recommended practices from garden centers is adding gypsum. Unfortunately, over time this substance can be detrimental to garden soils; its effectiveness at breaking up clay granules is short-lived while also leading to issues such as high levels of sodium in the soil.

    Avoid using gypsum for long-term soil health if possible; rather use organic amendments like worm tea or liquid from your worm farm as they are safer and more sustainable solutions that provide similar results without adding salt to the soil. These also offer other long-term advantages like increasing humus levels as well as adding beneficial bacteria and fungi that feed on the gypsum to produce usable sulfate ions that plants need.

    Add worms

    Gardeners know what perfect soil looks like: loamy, rich, crumbles easily in your hands – qualities most of us want in our own gardens but can be difficult to achieve when dealing with clay soil. However, there are ways you can make clay more suitable for gardening with different techniques such as changing its composition.

    Start by adding organic matter to the soil. This can help break up clay particles, improve drainage, attract worms and microorganisms that further loosen it, as well as attract grass clippings, hay, rotting manure or leaves as an excellent organic source. Compost is often the best organic option; other possibilities could include grass clippings, hay, grass cuttings or leaves as alternatives.

    Organic matter alone will not do enough to improve clay soil; you need also plant vegetables specifically suitable for clay soil to break it up and allow drainage better, while providing additional nutrients for the environment. Carrots, daikon radishes and kale are some of the best crops to grow here.

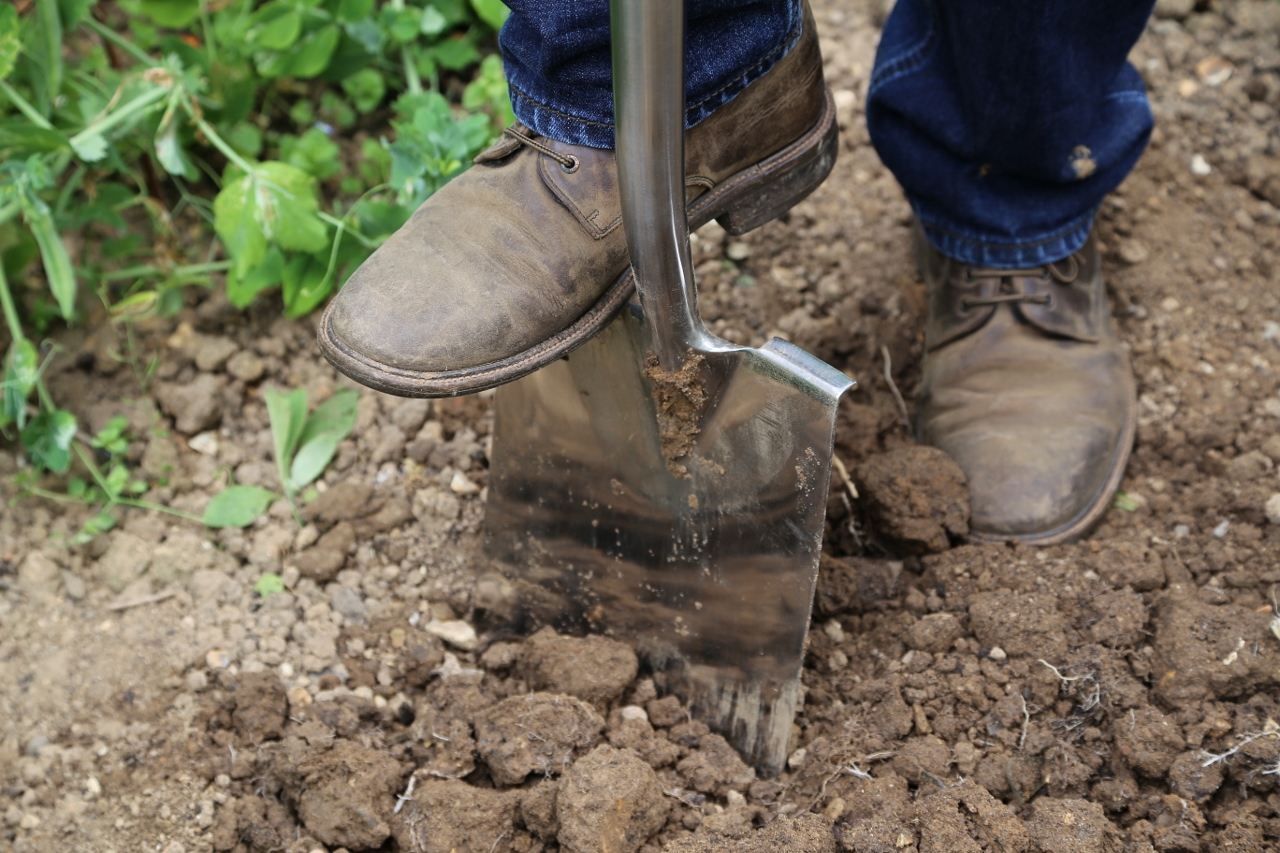
    Another essential step in improving clay soil is aerating it with either a spade or tiller, taking care not to disturb too much, as doing so can compact it again.

    Rock dust can help amend the soil by opening up spaces between clay particles. This improves drainage, providing water and oxygen directly to your plant roots, and facilitating better drainage. You could also plant cover crops or other types of tolerant species.

    Improving clay soil may take time and patience, but its rewards are well worth your while. Once improved, it becomes much easier to work with and will produce delicious and nutritious produce in your garden. Be sure to test it periodically as additional amending may be required over time – by following these simple steps, you can create a healthy garden that produces tasty food that’s beautiful too. Get started aerating and amending clay soil today!

    Add mulch

    Clay soils contain numerous tiny particles clinging tightly together, creating an efficient surface area to retain water and nutrients. They require plenty of airflow and organic material in order to loosen up.

    Amending clay soil may not be an effortless or quick process, but with consistent amending over time it can become garden-worthy soil. Though results may take several seasons before becoming apparent, they’re worth waiting for!

    As your first step, add organic material. This could range from well-rotted manure and leaves to leaves and shredded bark – ideal would be adding layers of mulch that decompose over the season and work their way back into the soil as they decompose.

    Cover crops can also help add organic matter, and alfalfa, clover and winter wheat are good examples. Their roots break up clay while creating organic material over time.

    Amending with gypsum can also help your clay soil, though before doing so it is wise to conduct a soil test first. Gypsum may alter the mineral balance, so only use it if you know you need it.

    To aerate clay soil, you can utilize compost and leaf mold applications or plant grasses and wildflowers that thrive in clay-rich conditions to help break up its structure while creating an eye-catching garden while fixing its deficiencies. These solutions will work towards fixing your soil while creating beautiful garden spaces at the same time!

    As a last step towards improving clay soil, avoid overworking it when wet – this will reduce compaction which causes poor drainage, as well as creating clumps that clog tillers and make working the garden difficult.

    Once you’ve added organic material and aerated your clay soil, it is time to start fertilizing it with fertilizers. When choosing organic products that are low in nitrogen content, use a soil testing kit to see if any additional nutrients need to be added and how much is necessary.

  • How to Grow Meyer Lemon Tree

    How to Grow Meyer Lemon Tree

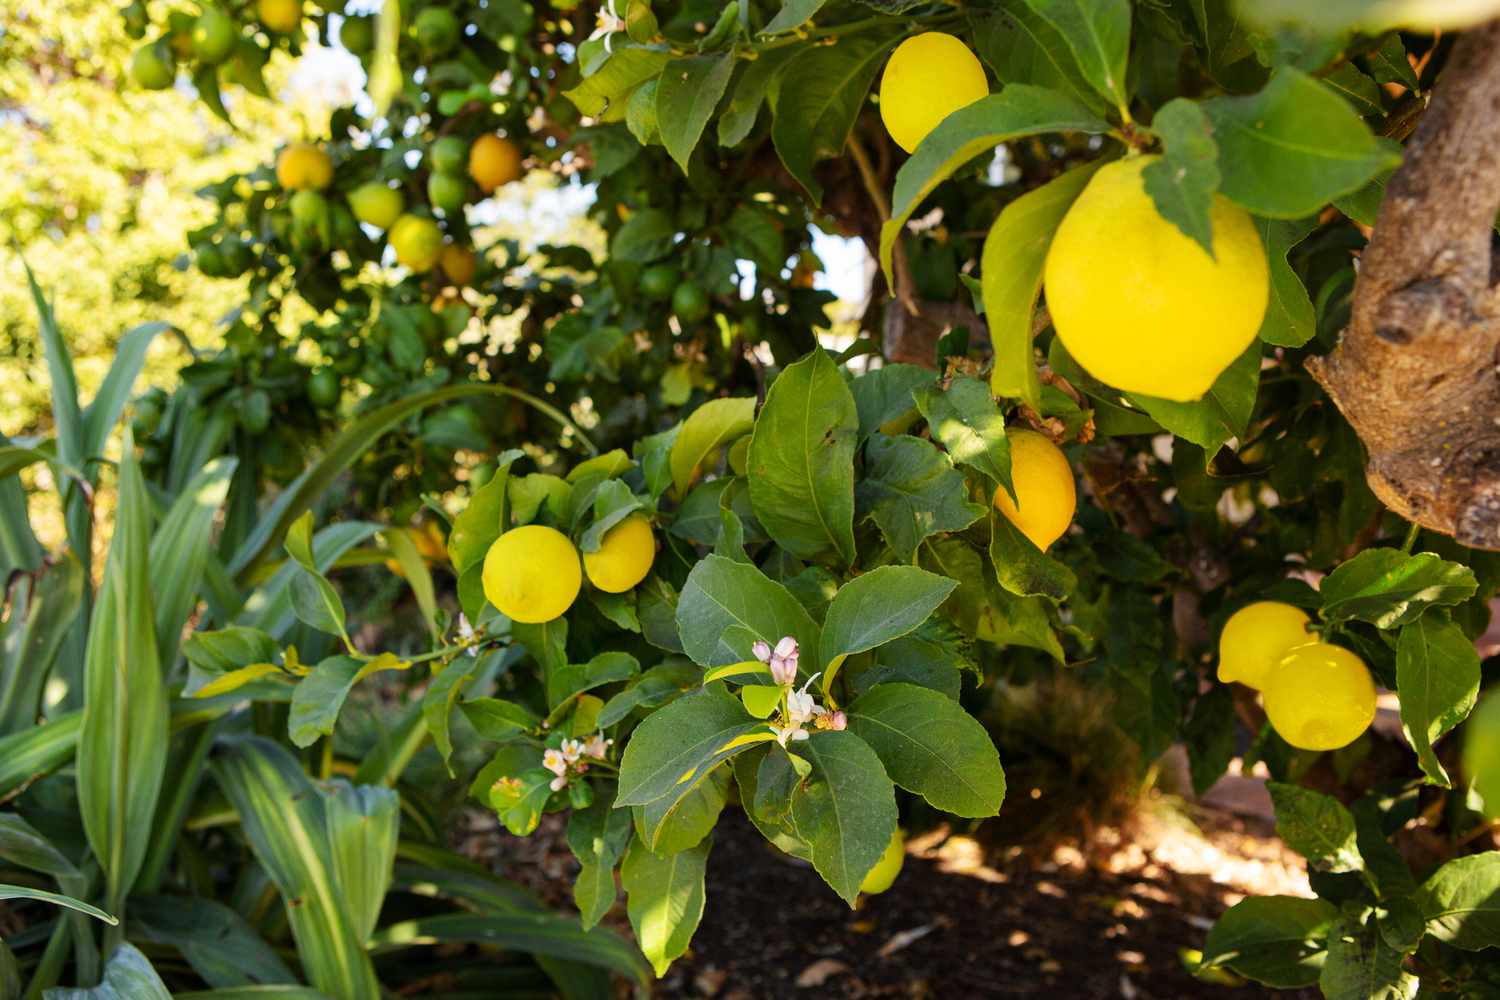
    Improved Meyer lemon trees can be quite hardy, yet it is best to bring them indoors during winter in all USDA zones except 8b and 9a. Once inside, hand pollination of flowers to promote fruit production as well as regular fertilization are more easily managed indoors.

    Pruning can help to promote more compact growth, while diverting energy toward fruiting lemons you select for fruiting.

    Planting

    Meyer lemon trees can be grown both in the ground and as low-maintenance container plants, providing an easy maintenance option. When planting directly in the soil, select an area with morning sun and afternoon shade (except in regions experiencing hotter summer weather, where afternoon sun may be preferred) with loamy soil that drains well with an acidic pH range between 5.5 to 6.5 (pH 5.5 to 6.5 is optimal). Meyer lemon trees require regular but consistent watering in order to stay vibrant – water when the top inch of soil becomes dry; as a rule-of thumb check this every week or two for optimal success!

    If planting your Meyer lemon tree in a pot, select a container 1-2 sizes larger than its nursery container and fill it with an equal mixture of peat moss, potting soil, vermiculite or perlite. Carefully slide out of its nursery container, massage its root ball to loosen up and remove any dry or dead roots as you go. Finally plant so that its upper roots barely protrude above soil level while adding more potting mixture on top of the container for coverage.

    Indoor Meyer lemon trees require at least 50 percent humidity for optimal growth; to protect their leaves from wilting and the formation of brown blisters, keep your tree away from heating vents and drafty windows and mist its leaves several times daily or place it on a tray filled with water and stones for extra humidity.

    Though fruit trees take time to mature and produce fruit, proper care such as feeding and pest control can hasten their development. Fertilize once every month during the growing season with a citrus-specific fertilizer high in nitrogen content; an ideal choice would be slow release formula fertilizers.

    Sunlight

    Meyer lemons are less acidic than typical grocery-store lemons, making them an attractive option for food and beverage lovers. Meyer lemon trees thrive indoors in zones 8-11 but require adequate sunlight and regular watering in order to produce fruit. It is best to bring your Meyer lemon tree indoors during fall and early spring when outdoor conditions aren’t yet suitable, providing enough sunlight and regular watering as required to produce fruit. Ensure the soil remains moist without overwatering – keep an eye out for signs such as wilted leaves or roots becoming saturated!

    As Meyer lemon trees are self-pollinating, you don’t have to plant them with another tree for it to produce fruit. However, if you bring one inside with you, hand pollination of its flowers is required in order to produce fruit – this can be accomplished using either a paint brush or Q-tip to brush pollen from one flower to the next until either they begin fading away or lemons appear. Repeat daily.

    Citrus trees like Meyer lemons require regular fertilization to remain healthy, and adding a slow-release citrus-specific fertilizer or compost tea once every month during their growing season is key to their overall wellbeing. Be careful to avoid overwatering; too much moisture can lead to root rot and fungal growth. When the weather warms up again, your Meyer lemon tree should be transplanted outdoors again in an open but protected location gradually by increasing temperature gradually rather than making sudden temperature shifts, as sudden temperature changes can shock plants. When transplanting between pots be sure that it has room to grow!

    Watering

    Meyer lemon trees are popular as low-maintenance container-grown plants both outdoors and inside, due to their relatively low maintenance needs. While somewhat cold-resistant than Eureka or Lisbon lemons, Meyers do well in USDA Hardiness zones 8-11 with plenty of sun exposure and good airflow needed. When flowering begins on your tree it’s also beneficial to fertilize with citrus or fruit-producing fertilizer which tends to be slightly more acidic than general purpose plant food products.

    Just like other citrus trees, Meyer lemon trees are self-fertile and don’t require cross pollination in order to produce fruit. If you’re growing one indoors during blooming season, however, manual pollination will need to take place manually – use a dry paintbrush, Q-tip or similar tool and gently move pollen from one flower to the next using light circular movements so as to move pollen from its stamen into its stigma ensuring fertilization of each individual flower.

    Water your tree regularly but avoid overwatering it. Soil should remain moist but not soggy, while trees prefer an acidic environment with a pH range between 5.5 to 6.5 for optimal growth. If your soil doesn’t meet those standards, add sulfur or lime to change its characteristics or add sulfur powder directly.

    Once temperatures drop below 40 degrees, bring the plant indoors slowly while watering it to reduce stress and facilitate fruiting. As soon as temperatures warm again, you can reintroduce it to its environment while using a small fan to promote airflow while the tree readjusts to its new surroundings.

    Fertilizing

    Producing lemons can be a labor-intensive and energy-consuming task, so it is crucial that they receive all of the required nutrients in order to produce fruit more quickly. That is why fertilizing plays such an integral role – by increasing energy availability to your trees it speeds up growth and accelerates fruit production more rapidly.

    Citrus trees require not only ample water and sunlight to thrive, but they also require the correct balance of nitrogen, phosphorous, and potassium in their diet to produce fruit in optimal condition. You can provide this essential food source by feeding your Meyer lemon tree three times each year with high-nitrogen fertilizer.

    When fertilizing a Meyer lemon tree, be careful not to go overboard – too much fertilizer can damage its health and reduce growth. One tablespoon of magnesium sulphate (Epsom salts) per gallon of water in your citrus tree’s irrigation system once every month should help ensure its nutritional needs are fulfilled.

    Meyer lemon trees blossom all year long, but at their most productive during fall and early spring when temperatures allow bees to pollinate them. Indoor meyer lemon growers can pollinate them themselves using a paint brush or Q-tip run over each flower daily for maximum productivity.

    Preventative care is key to keeping a meyer lemon tree in good health, including regularly trimming dead branches and harvesting overripe fruit. You should also ensure it receives ample airflow so as to avoid fungal issues. In case of pest problems, spraying horticultural oil or neem oil regularly should help eradicate them.

    Pruning

    Meyer lemon trees thrive outdoors in warm USDA hardiness zones 9-11 climates, but can also do well indoors when kept in a container and brought inside when temperatures fall below 50 degrees Fahrenheit. Once indoors, place it near a south-facing window where it will receive between 8-12 hours of daily sun. Keep away from heating vents that could dry out its leaves or attract spider mites for optimal success.

    Once your plant is settled in its new container, pruning it regularly can encourage bushy growth and more compact trees. Remove any dead or diseased branches as well as rootstock suckers that appear throughout the growing season. Aim for one branch in the center of the canopy as support for fruit-bearing blooms on remaining branches.

    As your tree matures, regular pruning will help develop scaffold branches for carrying heavy fruit loads. Aim to prune one or two large scaffold limbs every three years or so as well as any others that take up too much room in the canopy or block light from reaching its center.

    If your Meyer lemon tree lacks pollination, you can mimic its natural process by gently brushing pollen from flower to flower using either a soft brush or Q-tip. Do this regularly so your trees produce healthy fruit; Meyers planted as rootstock can begin producing fruits after two years while seed-grown varieties often take three or seven.