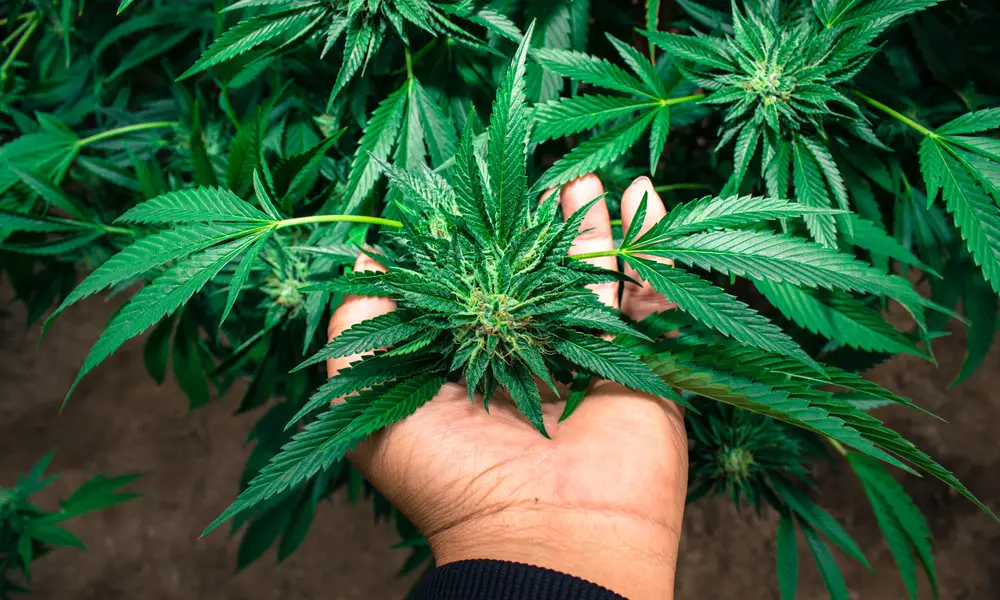
Legal cannabis is spreading like wildfire across the United States, Canada, and many other countries across the globe. People are finally allowed to grow cannabis!
Are you ready to grow cannabis at home? If yes, then you have come to the right place. Welcome to the rapidly growing community.
Wondering how to start the process? Don’t worry, we have your back! In this step by step journal, you will be enlightened by all the procedures needed for growing cannabis at home.
In order to flourish each cannabis plant will need:
- Light to get the best quality
- A well-ventilated space
- Proper temperature
- The place where the plant will grow
- Nutrients that you can add to water or soil
- Freshwater for the survival and growth of the plant.
You may also like: 420expertadviser
Step # 1: Indoor growing of cannabis
Indoor cultivation of cannabis is a cheap way to get started if you are planning to grow a few plants. One thing you should keep in mind that those plants will be cent percent dependent on your caring in order to survive.
Temperature is one of the vital aspects of indoor growing and you should properly investigate the space where it will be grown. Young plants will grow faster in warm temperatures ranging from 20 to 30 degrees Celsius.
But soon as they become a bit older, you need to keep the temperature slightly cool. Maintaining a heat from 18 to 26 degrees Celsius will produce the best buds.
To maintain the correct heat, you can install bright lights and a fan that can pull the excess hot air from that space.
Step # 2: Choosing the right to grow light
There is a wide variety of grow lights for the cannabis plant.
- Fluorescent lighting
They are technically made for germination of seeds but you can use them for growing cannabis as well. Only lookout for a more power output model.
- LEC grow lights
This type of light has a positive trait in cannabis growth. The plant will grow faster and you will be impressed by the results of your first grow.
- MH & HPS grow lights
Metal Halide in combined with High-Pressure Sodium is what commercial growers make use of when growing indoor cannabis. They are very cheap and easy to install.
Step # 3: Choosing the growing medium
The following are the popular grow mediums:
- Soil – Grow the plant in an organic composted soil
- Soilless mixture – Anything other than soil excluding coco coir, vermiculite, etc.
- Growing in water or hydroponics – These will yield fast growth with good results when combined with MH/HPS/LED grow lights.
- Rare types of hydroponics – Few people grow cannabis suspended in moist air or in a fish tank, but they are really hard to find.
Step # 4: Select your nutrients
- For soil growers:
Unless you are using composite manure mixed with soil, you will need cannabis nutrients to make sure the plants produce the best buds, especially when they will reach the budding stage.
- For those who are growing it soilless or hydroponic:
If you are growing your plant on anything besides soil or directly in water, you will have to add nutrients specifically made for hydroponics.
Step # 5: Choosing the seed
If you know other cannabis growers, in reality, getting clones from them will be quite simple. They will sell you clones easily but it will be hard to buy seed from them. However, buying seeds or clones from them has a great advantage as you can trust the things you are receiving.
The best way to buy cannabis seeds is from an online store. It is reliable and safe to purchase seeds from a breeder or a reputed seed bank.
Step # 6: Germination of seeds
You can follow the popular paper towel method to germinate your seeds.
- Place the seeds on a moist paper towel, fold it and keep it on a plate.
- Cover it with another plate so that the moisture gets trapped in.
- Within 4 days it will sprout, or else a week for older seeds.
- Gently insert the sprouted seed on a moist growing medium.
- A seedling emerges with two small leaves.
- Place an LED bulb about 7 inches away from it and keep the light on for a whole day.
- Later, a few leaves will grow from the seedling, confirming the start of vegetation.
Step # 7: Vegetation stage
The young plant will grow faster at a warmer temperature. It is essential to provide 18 to 24 hours of light when you grow them indoors. In the early stage, it is not important to water them regularly.
However, you need to add some nutrients to the growing medium if you feel like your plants are deprived of essential nutrients like nitrogen. Keep in mind the percentage strength of those nutrients while applying them to your small plants.
Step # 8: Budding stage
This is the vital stage and you have to do the three things-
- 12 hours of light and rest 12 hours of extreme darkness
- Identifying the gender of your cannabis plant
- Getting rid of male plants
You will observe that half of your plants will end up as female. The female plants will only make buds. That’s the reason many growers purchase clones that will result in female plants.
After two weeks you will have the female ones. The female plant will start growing pistils at the top of branch joints. These will grow on top of each other making the bud.
Step # 9: Harvesting
Observe till your bud stops making pistils and have developed a darkening color. Harvest them only when you find 60 to 70 percent of the hairs have darkened.
Grab a pair of scissors and gently cut the plants down in a convenient way.
Step # 10: Storing the harvested buds
After cutting the buds, you have to make them dry. After they have dried it is time to store them to get the everlasting effect.
Put them in tightly closed mason jars, away from hot temperature and sunlight. Open the jars every day for some time during the first 2 weeks to release any moisture from them. Moisture will help developing molds.
You should cure the buds for at least 30 days.
Conclusion
So that was all about growing cannabis and hope you were able to grasp every detail. Growing them indoors is not that hard.
Do not forget to keep your harvested buds in a dry, cool, airtight place for using them over a longer period.