
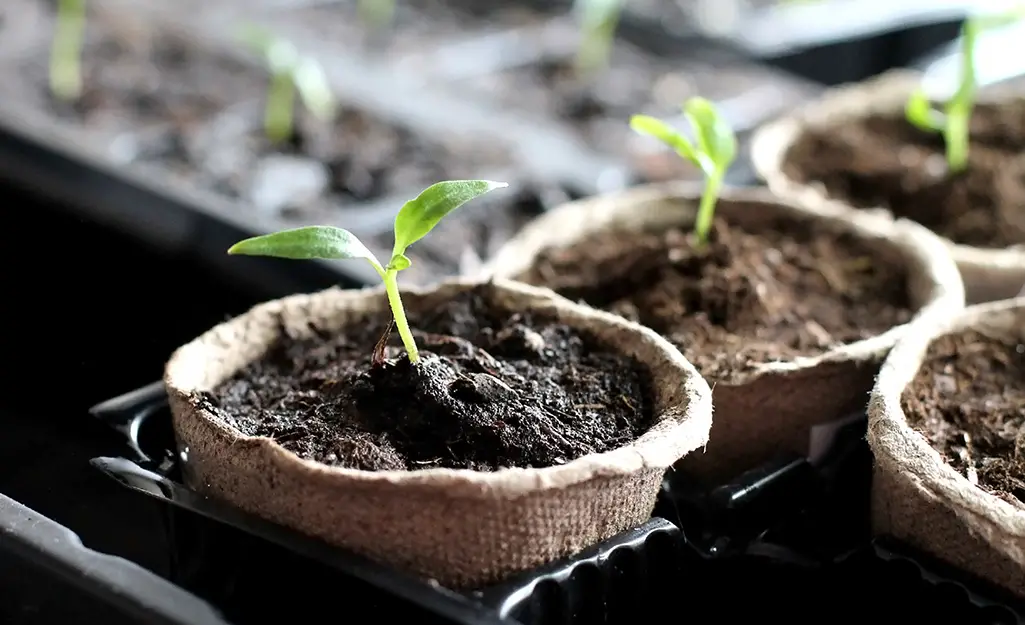
Peat pots provide an economical and simple method of seed-starting indoors or in the garden, offering numerous advantages such as preventing transplant shock.
Before sowing seeds in strips, pots or pellets, it’s essential to presoak them first to help retain moisture and prevent too rapid drying out of your chosen medium. Doing this helps ensure the soil remains moist throughout its growth and will ensure proper seed germination.
Preformed Pots
Preformed pots offer an easy, hassle-free solution for starting plants indoors. Composed from layers of sphagnum peat moss harvested from bogs, swamps and other wetland areas, it is compressed into containers with top and bottom seams connected at their seams and planted directly into soil without disturbing young roots. Peat pots provide natural moisture-retaining capabilities which drain excess water quickly while still supporting various forms of vegetation such as flowers, herbs, vegetables and greenery – perfect for starting seeds of mint from seed or starting cuttings of thyme gardens!
One downside of plastic pots is their slow break down into the ground, and insufficient drainage compared to other seedling containers. Furthermore, they must be kept in an ideal climate (warm, sunny place) while keeping soil moist at all times; if they retain too much moisture for too long then place in warm water pan for several minutes as an aid for drainage.
Pots come in various sizes, but 3-inch-wide pots are best for growing most flowers and herbs. If you want to grow leafy greens or larger vegetables, 4-inch wide pots might be more appropriate.
When planting is time, simply remove the top and sides from your pot before digging a hole deep enough for it, complete with its roots. Fill it up with soil that best fits your plant – most herbs and veggies thrive in loamy soils while sage, lavender, mint and black-eyed Susan thrive with more sand-based mixtures.
If you’re searching for an eco-friendly alternative to plastic seedling trays, make your own peat pots out of paper instead. Cardboard tubes like toilet paper and paper towel rolls work great as peat pots; just cut four evenly spaced cuts near the rim, creating flaps which fold back upon themselves to form desired shapes.
Strips
Peat pellets are small discs made of compressed peat held together with biodegradable mesh that expand when wet to form individual cylinders that you can plant into the ground. Peat pellets make seed starting indoors easier as they don’t provide an environment conducive to mold growth, however root rot can still occur as some don’t provide adequate drainage holes and some only have shallow holes for planting which could result in fungal infections in your soil and prevent healthy root development. Unfortunately, since they decompose slowly this could prevent healthy root development as well.
Start tomatoes and other vining plants off right using these pellets. Additionally, these pellets can also be used to start herbs that require lots of moisture like parsley and chives; once these herbs have developed at least 2 to 4 sets of true leaves they can either be planted directly into the ground or transplanted to larger peat pots for transplanting later.
For optimal peat pellet or strip planting, create a hole deep enough to completely cover its cylinder with soil. Gently press in place the peat strip or pellet, add potting soil, then water thoroughly. If any portion of peat sticks out above soil surface, cover it with a thin layer of sand to protect it from drying out and inviting fungus growth.
Utilizing strips and pellets has many advantages for young plants. First of all, it avoids having to extract your plant from an inflexible plastic container, which could damage both its foliage and roots during removal. Second of all, transplant shock is dramatically reduced due to this method of handling plants more gently.
Create your own paper seed starter pots from black and white newspaper (not glossy, colorful newspapers which may contain toxic heavy metals) by cutting out the center of each page and folding it into a cylindrical form before filling with potting soil. Remember to presoak before sowing seeds as to avoid overwatering the paper cylinder containing your soil; once seeds start germinating you can then use the starter pot in another larger one for future seed germination purposes.

Pellets
Peat pellets, similar in size to small paper cups, are ideal for starting seeds or cuttings as their air pockets help the roots take hold. Furthermore, being biodegradable makes these pellets suitable for planting directly in garden beds or containers that will eventually go in the ground. When planting with peat strips or pellets it’s easy – simply dig a hole that fits their entire size, place in pellet in it, pack earth around it gently then water thoroughly – you can grow nearly every seed or plant imaginable including tomatoes & vineing vegetables; however some might take longer before reaching transplantable size once established in these pots compared to traditional containers containing soil alone.
Keep in mind when using peat-based potting products that they are highly absorbent, leading to overwatering that could cause seedlings to rot and mold if overwatered, particularly when combined with low-quality soil mix or kept in an environment lacking air circulation. If green, white, or bluish mold grows on either the surface of soil or pot itself then dump out and replace with fresh soil mix immediately.
Noting another issue related to these peat based products, they are susceptible to root rot infestation if given inadequate drainage, which can be an especially major problem when growing vegetables and seedlings from seed. Therefore, it’s essential that your potting mix or soil mixture has adequate drainage holes so as to protect yourself against this issue.
Eggshells can help boost the amount of nutrients in your potting mix by providing additional cations and potassium. Biodegradable eggshells contain vitamins and minerals essential for healthy plant development; once finished eating eggs, simply score open their shells and crumble them up to help speed their breakdown in your soil or seedlings – adding organic material that will retain moisture more effectively while improving soil structure over time.
Eggshells
Peat pots are an invaluable tool when starting multiple seeds or sowing an entire garden, helping your seedlings develop strong and healthy while being biodegradable. There are various kinds of peat pots you can purchase and they come in various sizes–some come preformed while others can be strips or pellets–so when selecting seedling trays to plant your plants, it is crucial that the appropriate type is selected.
Vegetables, herbs, and flowers typically thrive in small peat pots as their shallow root systems don’t need much room for development. Larger pots might be preferable when planting larger plants like trees and shrubs to allow their seedlings to reach a size suitable for direct planting in the ground without becoming root bound.
To create a tray of peat pots, it will require mixing in some potting soil and water. Set your tray in an area that gets adequate sunlight outdoors or indoors with good lighting; be sure to water as needed so as not to allow the peat pots or soil dry out completely; this would cause moisture wicking away from their delicate roots and could even kill off seedlings altogether!
Once your seedlings have two to four sets of true leaves, it’s time to transplant them either into the ground or a larger pot. Use a spade or hand-held garden tool to break up and dig out the bottom of their peat pot, before pulling up on its sides carefully to release its root ball from it – take care not to damage delicate roots as you remove the pot!
If you don’t have enough Jiffy peat pots or prefer going organic, why not create your own substitutes? Eggshells make excellent biodegradable substitutes since they contain calcium and are biodegradable – plus free! If you aren’t an avid egg eater yourself, simply ask friends and neighbors if they could spare any shells to add to the compost heap. Boil some water on the stove then place shells inside for several minutes to sterilize before draining and rinsing well later when cool enough!