
Vanilla plants grow as vines that climb trees or poles; their epiphytic nature makes their environment an important factor when it comes to flavor.
Vanilla beans are one of the world’s most costly spices, due to their labor-intensive cultivation and harvest process, followed by an extended curing timeframe.
Pollination
Vanilla plants are epiphytic (similar to ferns) and usually grow wild on trees; however, potted versions can also be grown as decorative houseplants with some support. Like other orchids, vanilla must be watered regularly and fed diluted balanced fertilizer; indoor or greenhouse growing may require additional humidity and lighting support as well.
Once a plant reaches maturity, it will start blooming with vanilla flowers that only open for a limited amount of time each. Hand pollination must occur during this short window of opportunity to keep production flowing smoothly and avoid blooming to death and hampering vanilla production significantly. Wild pollinators of Vanilla flowers include Euglossa viridissima and some Eulaema species while it is thought stingless bees from Melipona can also carry pollen out, although no evidence has ever proven this effectivity when used commercially.
Pollinating Vanilla orchid flowers requires using a toothpick or similar object to gently lift and apply Vanilla pollen directly onto the pistil, usually first thing in the morning when pollen activity is peaking. You must take great care not to damage the flowers in this process as their pods will take 9 months to form before giving way and producing vanilla beans!
Beans are then graded according to their appearance and length; larger beans with near perfect features are considered Grade A beans, which will go toward making vanilla extract; smaller or split ends bean are called Grade B beans and used in making vanilla powder.
Most Vanilla plant issues stem from over and under-watering as well as inadequate humidity levels. The ideal way to address these concerns is by allocating a specific space for your plant in which to grow, with enough light and humidity for its success. When watering, be sure to thoroughly saturate its soil but allow some drying out time between irrigations – that way your soil doesn’t become waterlogged and starts rotting quickly!
Growth
Vanilla vines require lots of humidity in their environment in order to thrive, along with warm temperatures and bright but indirect sunlight. You can grow these beauties indoors or in a greenhouse if provided the appropriate growing conditions – they make rewarding yet challenging additions to any space!
To successfully cultivate a vanilla bean plant, start by taking a healthy cutting from an older vine with multiple nodes and let it heal for several days. Next, transplant into a larger pot or container for final transplanting.
As soon as a plant starts growing, it needs to be misted several times daily in order to provide enough humidity. A wooden plank may also provide support as vanilla plants are semi-epiphytic; meaning they take in moisture from both air and soil sources – although suspended in mid air is most efficient at drawing moisture up from below.
Plants will need to be fed through spring and summer using a diluted liquid fertilizer applied sparingly each week; just a little of this diluted solution should be added at a time.
Notably, vanilla orchid plants must be hand pollinated within their short window of opportunity in order to bloom successfully. Flowers only last one day and must be pollinated within this period in order to produce flowers.
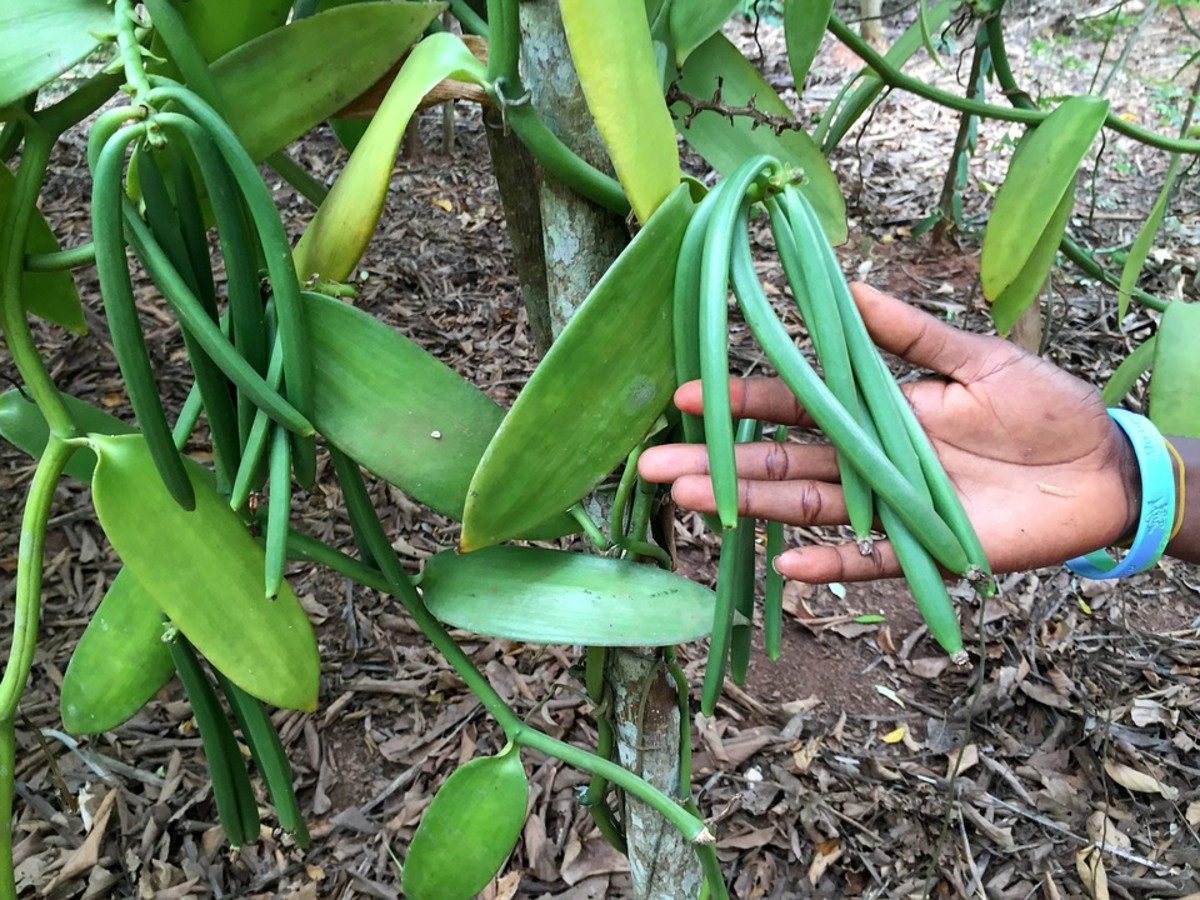
Once pollinated, plants begin producing green pods resembling vanilla beans that will be ready for harvest in October through March. Once harvested, these must then be “sweated” and dried before being used to make delicious vanilla flavoring products.
Vanilla orchid roots differ significantly from those of other tropical plants in that they consist of both terrestrial (ground) and aerial roots, with nonbranching aerial roots formed along stems opposite its leaves, and terrestrial roots with root hairs to aid with attachment to supports like tree trunks or walls, providing both anchorage and uptake of nutrients from surrounding soil.

Harvesting
Vanilla must be pollinated for it to grow properly; without pollination, its flowers only last one day before withering and dying, leaving no vanilla beans behind. While once bees were used as pollinators of vanilla orchids in nature, these insects have since gone extinct; hand pollination of vanilla plants now must take place for commercial production.
Orchids are pollinated using a hand-held tool known as a “marieuse.” Similar to a toothpick, a marieuse can be used to lift and hide the rostellum (the stigma that separates male organs from stamens) under the stigma, so its anther can come into contact with its stigma for fertilization. A skilled marieuse can fertilize up to 1500 flowers daily!
After pollination, vanilla orchids produce green bean-like pods which must be carefully exposed to sun and allowed to sweat before sorting and grading according to size, length and appearance. Larger beans with near perfect surfaces are known as Grade A beans while thinner beans with split ends are Grade B beans used primarily to make vanilla extract.
As soon as bean pods are ready to be harvested, farmers must carefully cut them from the vine using scissors or shears. After cutting from their vine, these pods must be left hanging in an inactive area for about six weeks so they may sweat and transform from green to light brown – an important process which gives vanilla beans their distinct taste, aroma and mustiness.
Once harvested, vanilla pods must be cured, which involves sweating and drying them to eliminate excess moisture, promote biochemical reactions that create flavor and aroma, and facilitate moisture condensation that causes condensation of moisture on their surfaces (which causes “sweating”) before being stored densely together for three months in dark and protected places.
You may also like: guest post on Food/kitchen site.
Storage
Vanilla beans should be stored in a cool, dry location to preserve their aroma. A glass container with a tightly fitting lid or double zipper bag are both suitable. Keep them out of direct sunlight to reduce sudden temperature changes and moisture fluctuations – invest in both a hygrometer and thermometer so you can monitor their condition regularly.
Refrigerating or freezing vanilla beans will dry them out and harden. Instead, store them in your pantry or any other cool, dark location where drastic temperature fluctuations won’t occur – keeping the beans moist will prevent damage due to too much drying out.
As soon as you are ready to use vanilla beans, it is crucial to use them immediately before their moisture content dwindles and makes them stiff and brittle, making it hard to work with. Souffle and plump pods will be easier for splitting open and scraping out caviar from.
To ensure the vanilla bean plant blooms and produces ripe vanilla beans, it is advisable to apply a diluted mixture of balanced fertilizer at every other watering during spring and summer. Fall and winter fertilization is no longer necessary since the plant won’t be active growth during these months.
Tahitian, Madagascar and Indian vanilla beans are three of the most sought-after varieties. Each variety offers its own distinctive taste; Tahitian vanilla has an almost cherry-like sweetness which pairs beautifully with desserts; Madagascar offers more classic vanilla notes suitable for baking; while Indian variety offers bolder and stronger notes which complement chocolate and strong spices well.